Edit Syllabus OTL Canvas Template
Step 1: Import the OTL Canvas Syllabus Template
Step 2: Go to “Edit Syllabus” below.
Step 3: Go to “Add or Rearrange Syllabus Blocks” below.
- Step 1: Click on the “syllabus” link in the navigation area of your Canvas course.
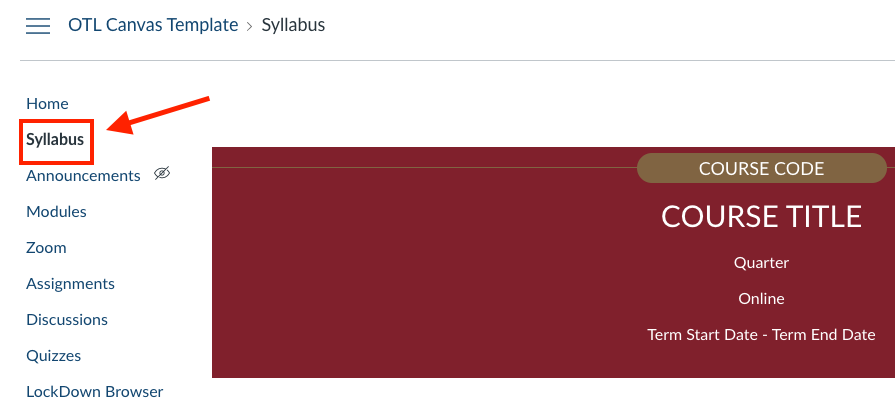
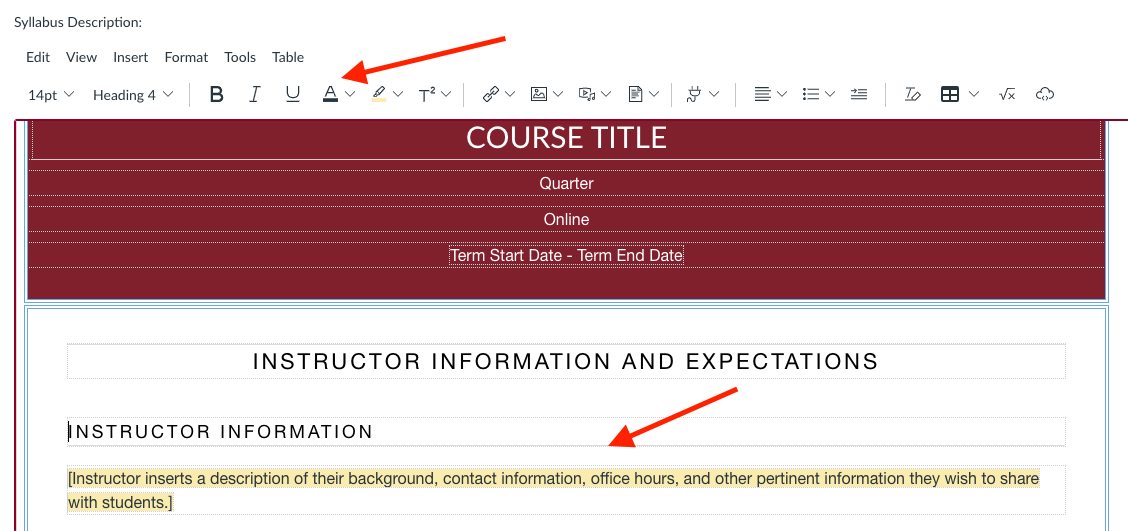
Step 2: Click the Edit icon located on the upper-right of the Syllabus page.

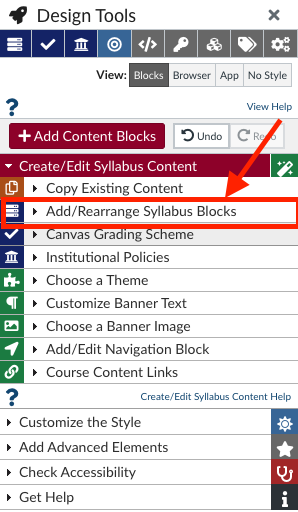
- Step 3: Launch the Design Tools interface by clicking on the rocket icon in the upper right-hand corner of the screen, or by using the short-cut keys Option-Shift-D on a Mac or Alt-Shift-D on a PC.

- Step 4: Go to “Add or Rearrange Syllabus Blocks” below.
Add or Rearrange Syllabus Blocks
- Step 1: Click on “edit” on the syllabus page to open the rich content editor.
- Step 2: Launch the Design Tools interface by clicking on the rocket icon in the upper right-hand corner of the screen, or by using the short-cut keys Option-Shift-D on a Mac or Alt-Shift-D on a PC.
- Step 3: To add, delete, or move syllabus blocks, click on the “Add/Rearrange Syllabus Blocks” option in the Design Tools editor.
- Step 4: Move each syllabus block by clicking and dragging the item up or down.
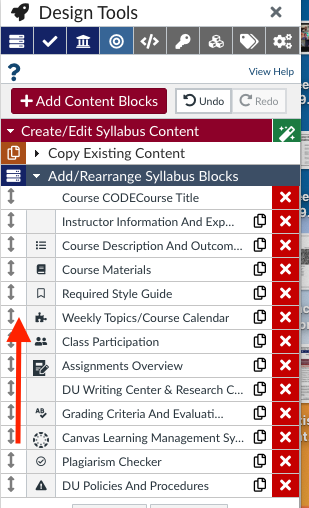
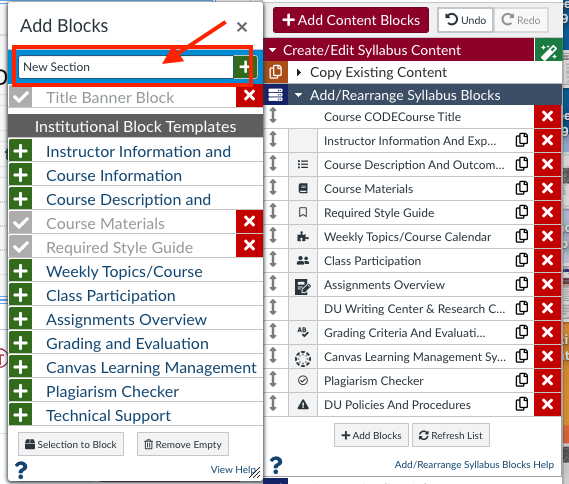
- Step 5: You can add additional content blocks by naming a new block in the “create new content block” field and by clicking the green plus icon.
- To remove a syllabus block, click the red X to the right of the syllabus block.
- Step 6: To add or remove icons click into the blank space before the content block title. This opens up the searchable icon library.
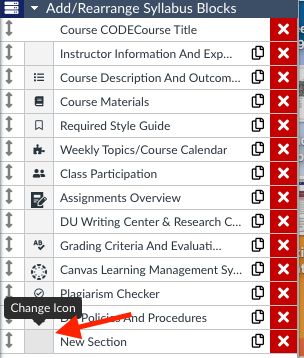
- Step 7: Choose an icon.

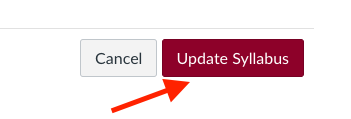
- Step 8: Check your work, then save the syllabus by choosing “update the syllabus” at the bottom of the Canvas rich text editor to save your changes.
Import an Example Syllabus Template
Note: This option is when you do not already have a syllabus template in your course. You can use the example template or you can build your own.
- Step 1: Click on the “syllabus” link in the navigation area of your Canvas course.
- Step 2: Click the Edit icon located on the upper-right of the Syllabus page.
- Step 3: Launch the Design Tools interface by clicking on the rocket icon in the upper right-hand corner of the screen, or by using the short-cut keys Option-Shift-D on a Mac or Alt-Shift-D on a PC.
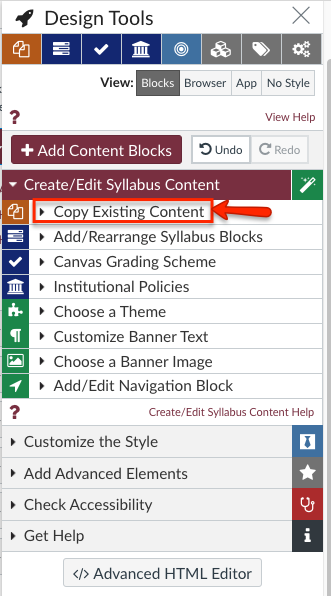
- Step 4: Choose “Create/Edit Syllabus Content” in the Design Tools editor.

- Step 5: Choose “Copy Existing Content”
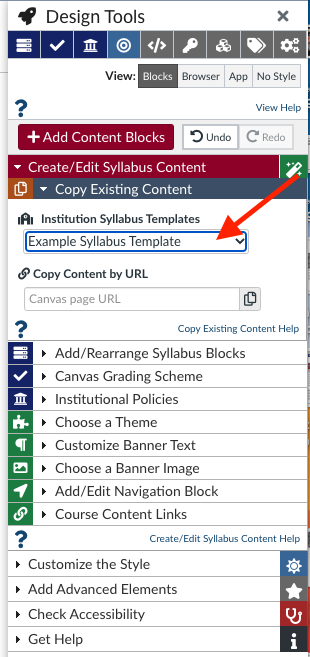
- Step 6: Under “Institutional Syllabus Templates” choose “Example Syllabus Template” from the dropdown menu. This is a universal syllabus template.

- Step 7: Edit text on the rich text editor in Canvas. It is recommended that you have a copy of your syllabus available to Copy/Paste the text of your syllabus into its appropriate section.
- Step 8: Check your work, then save the syllabus by choosing “update the syllabus” at the bottom of the Canvas rich text editor to save your changes.