The Microsoft Education tool in Canvas connects Microsoft applications, such as Teams, OneDrive, and OneNote to your course site, enabling instructors and students to access, share, and collaborate on content directly within Canvas. This article will provide details on how to set up and use the tool in your individual course(s).
The Microsoft Education tool is available in all Canvas courses by default, but some initial setup is needed to configure specific features within the tool. Follow the instructions below to complete the initial setup of the Microsoft Education tool.
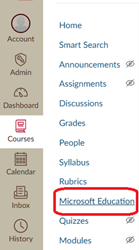
1. Open your Canvas course container
2. Click on “Microsoft Education” on the left-hand navigation menu
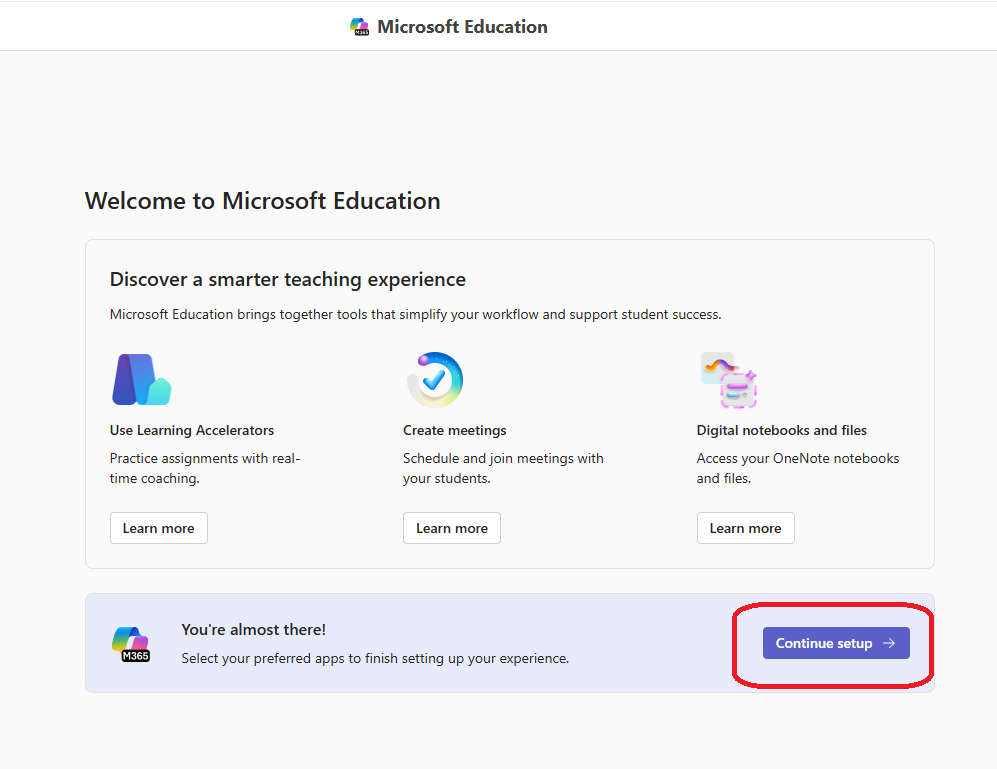
3. Click “Continue setup”
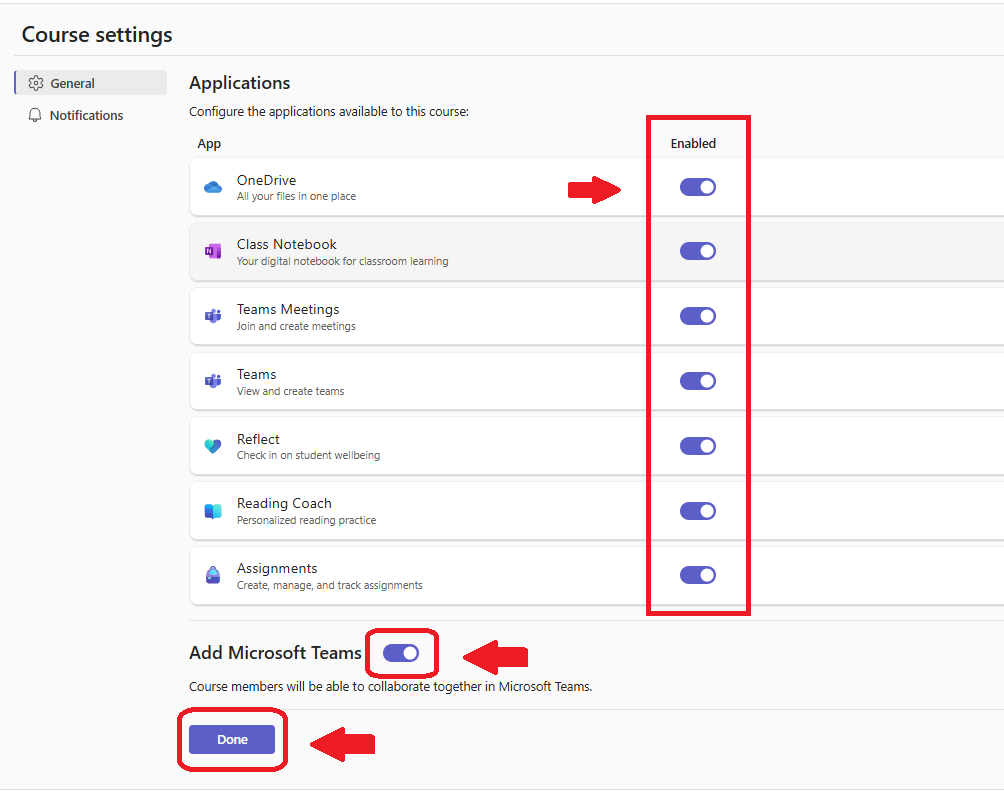
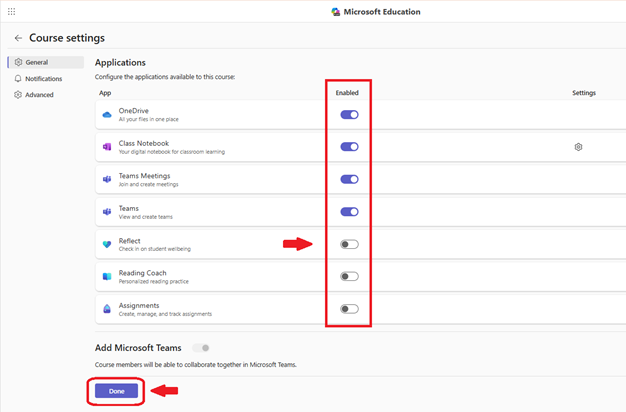
4. Enable or disable each application depending on your preferences. These settings can be adjusted later if you change your mind. If you would like to create a Team and automatically enroll your course members, click the “Add Microsoft Teams” toggle button. Click “Done” at the bottom of the page once you have made your selections.
How to Change Course Settings within Microsoft Education
Within the Microsoft Education tool, you can make changes to your course settings to control which Microsoft applications are visible to instructors and students. These settings can be accessed and changed using the following steps.
1. Open your Canvas course container
2. Click on “Microsoft Education” on the left-hand navigation menu
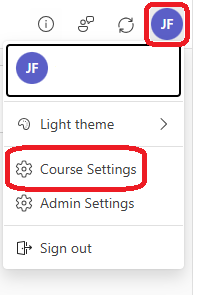
3. Click on your profile icon in the top right corner of the page, then click “Course Settings”
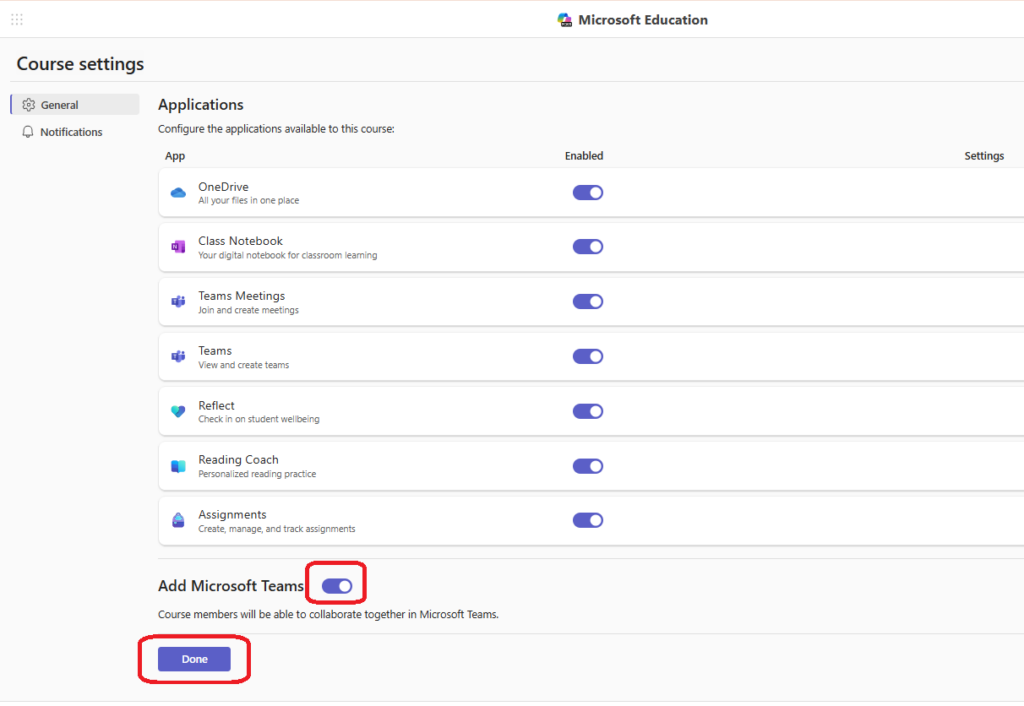
4. Adjust enabled applications as needed and click “Done” once finished
How to Create and Access a Team for Your Course
Microsoft Teams can be linked to your Canvas course via the Microsoft Education tool to create a dedicated online space for class communication, file sharing, and real-time collaboration. The integration automatically enrolls course members into the Team. The following steps can be taken to create your Team.
1. Open your Canvas course container
2. Click on “Microsoft Education” on the left-hand navigation menu
3. Click on your account icon in the top right corner of the page, then click “Course Settings”
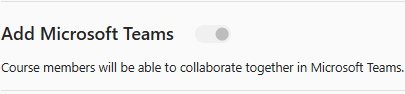
4. Toggle on the “Add Microsoft Teams” button and then click “Done.”
Note: if the “Add Microsoft Teams” button is grayed out, then a Team has already been created for your course site, and you can access it by following step 5.
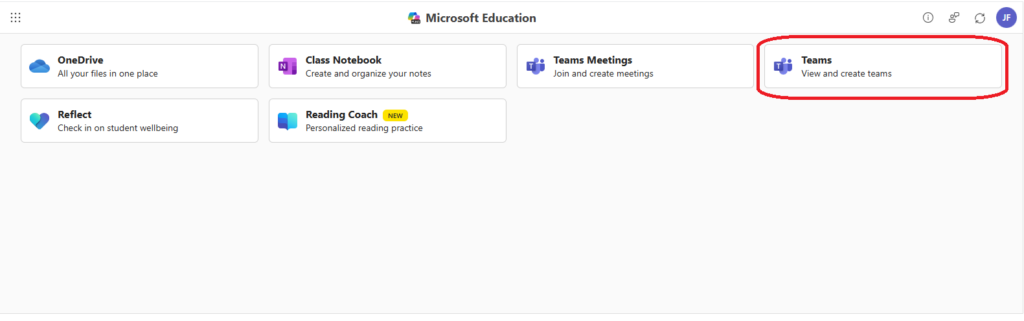
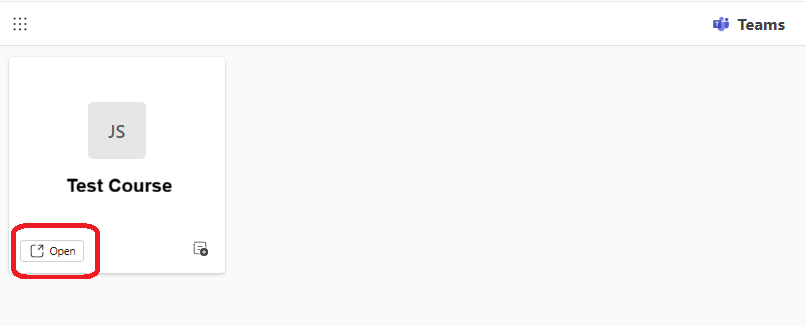
5. From the Microsoft Education home screen, click “Teams,” then click “Open” to access your Team.
How to Create a Class Notebook
OneNote Class Notebook can be linked to your Canvas course to provide a digital workspace for distributing materials, organizing content, and facilitating individual or group work. The integration automatically adds course members to the notebook, so instructors don’t need to manage enrollment manually.
Setting up the class notebook can be accomplished through the following steps.
1. Open your Canvas course container
2. Click on “Microsoft Education” on the left-hand navigation menu
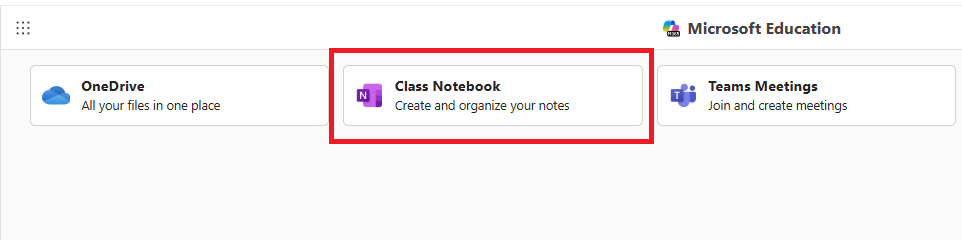
3. Click on the Class Notebook icon
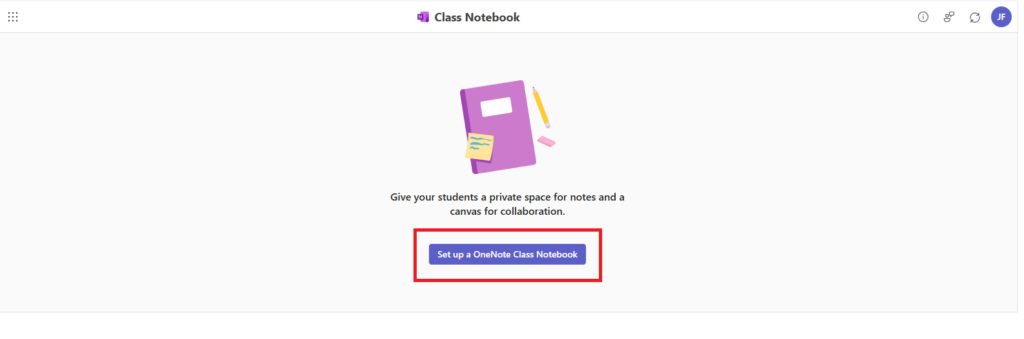
4. Click “Set up a OneNote Class Notebook”
5. Review the default Class Notebook spaces, which provide different view/edit permissions for students and instructors, then click “Next.”
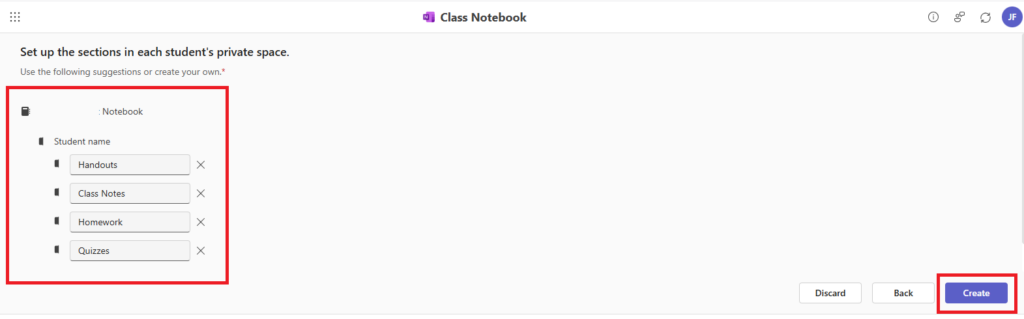
6. Configure the sections that each student will see in their private space within the Notebook or keep the default suggestions. Click “Create” to finish the setup process and then click “Open Notebook” to access the Class Notebook.
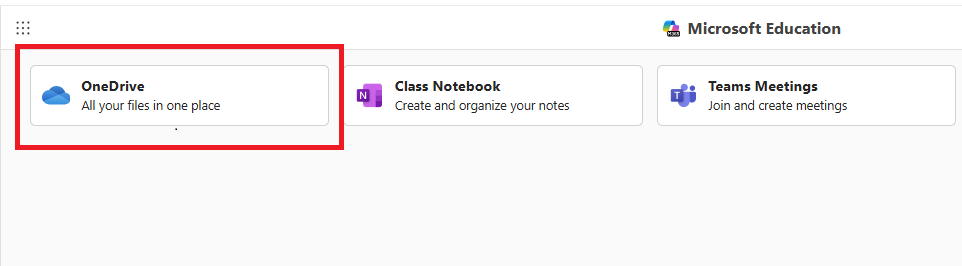
How to Access Your OneDrive Through Microsoft Education
OneDrive can be accessed in your Canvas course via the Microsoft Education tool to give instructors and students quick, convenient access to their personal Microsoft files. This allows users to pull in existing documents, presentations, or other resources from OneDrive without needing to leave Canvas. Follow the steps below to open OneDrive in your course.
1. Open your Canvas course container
2. Click on “Microsoft Education” on the left-hand navigation menu
3. Click on the OneDrive icon
Your OneDrive will be available automatically — no additional setup is required. Please note that each student will see only their own OneDrive when accessing the application.