Every Canvas course at the University of Denver is allocated 1 GB. In most cases, this is plenty of space. Here are some common causes why your Canvas course is running out of storage and possible solutions.
Video
Canvas offers a few options for uploading video files. We some recommendations to help your stay within your storage quote and to ensure ADA accessibility.
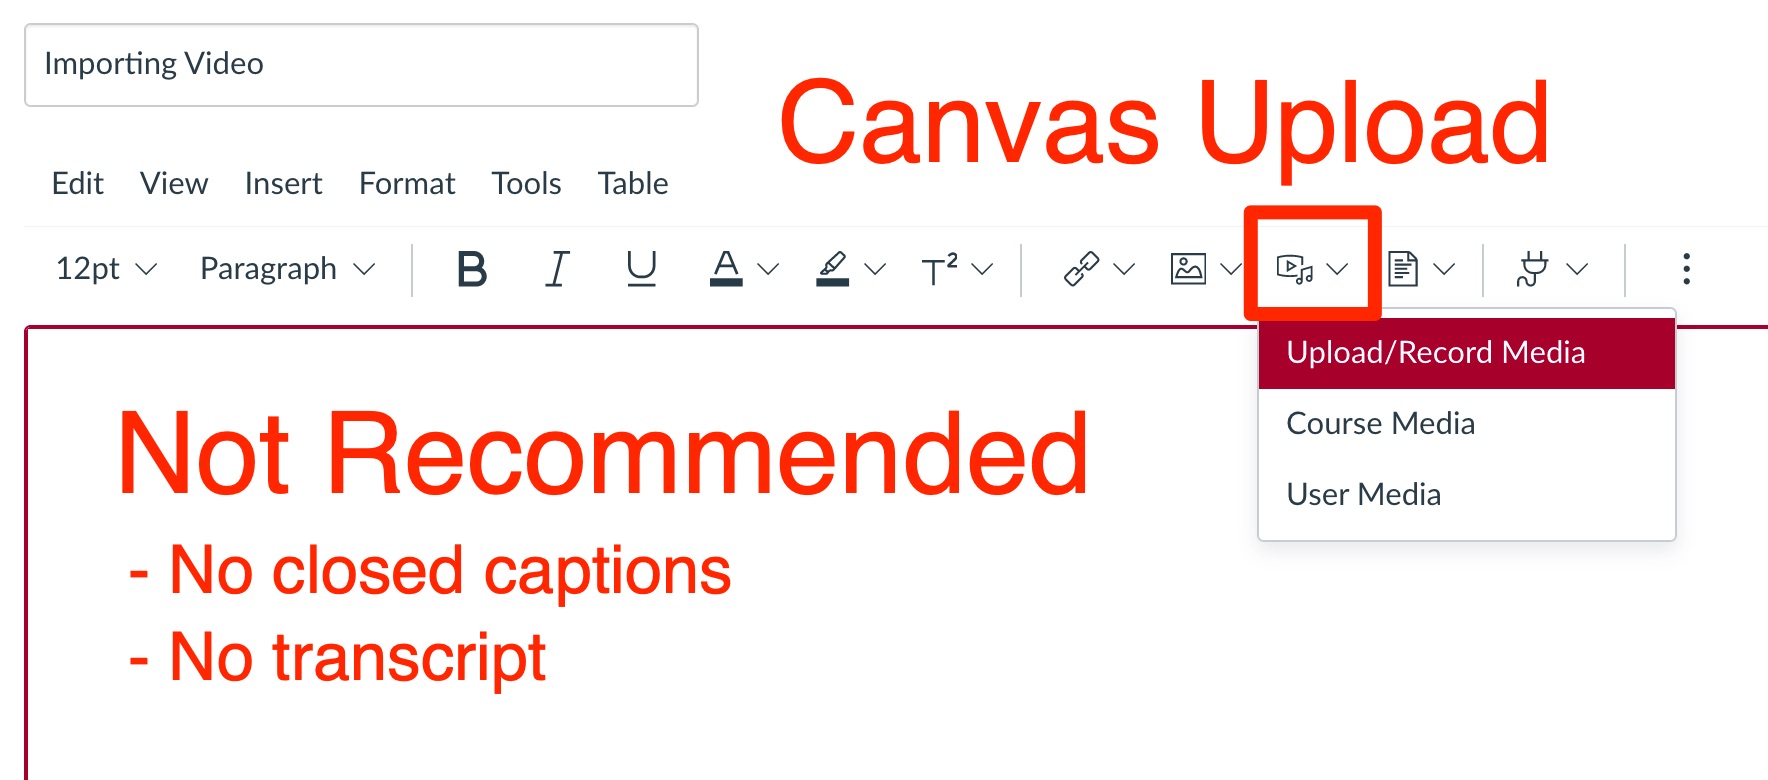
Avoid using the default Canvas Upload/Record Media or Files section.
- No auto-generated closed captions or transcripts
- No viewer analytics
- Requires Canvas course file storage
- Long videos will take a long time to download
- May not be compatible with the student computer. For example, .wav is a Window only format and .mov is a Mac only format.
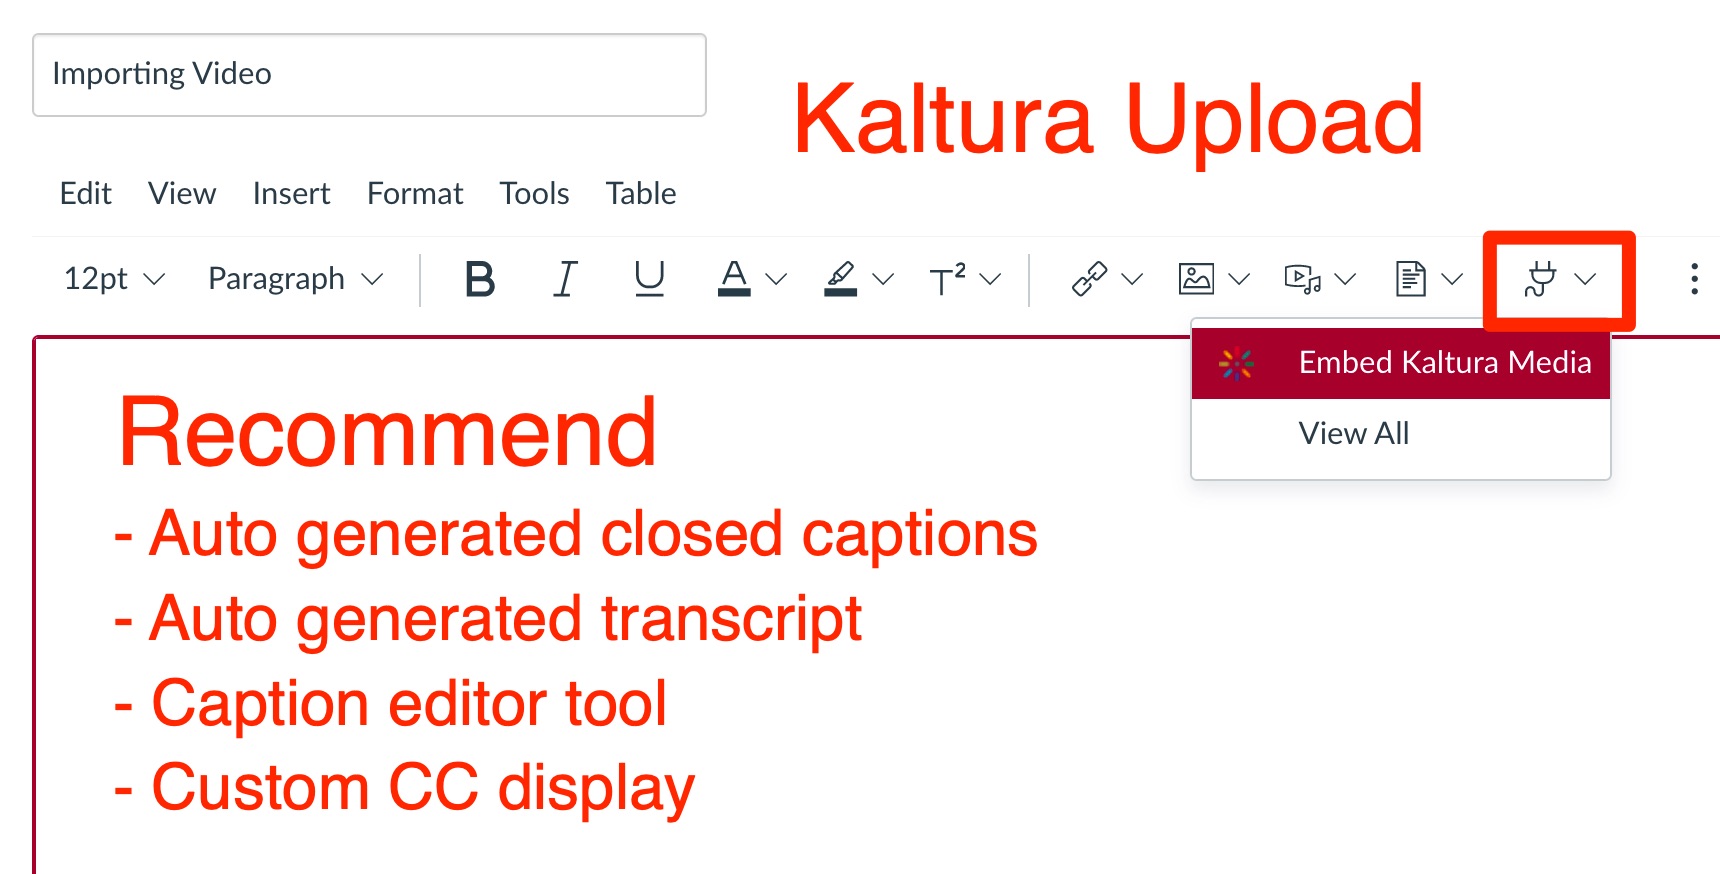
Instead, use the Kaltura Embed Media
The best option for uploaded video is the Kaltura My Media tool within into Canvas. This is the only Canvas video player that offers these features:
- Has auto-generated closed captions and transcripts.
- Allow viewers to customize close caption display.
- Has a closed caption editor to fix errors.
- Has viewer analytics.
- Does not use up Canvas storage.
- Students can quickly access video because Kaltura has robust streaming.
- Students will not experience compatibility issues because Kaltura will convert all video formats to optimized web-friendly video.
Closed Captions are required for all academic course videos in order to comply with the Federal Accessibility 508 Standards – 255 Guidelines and W3C Recommendations.
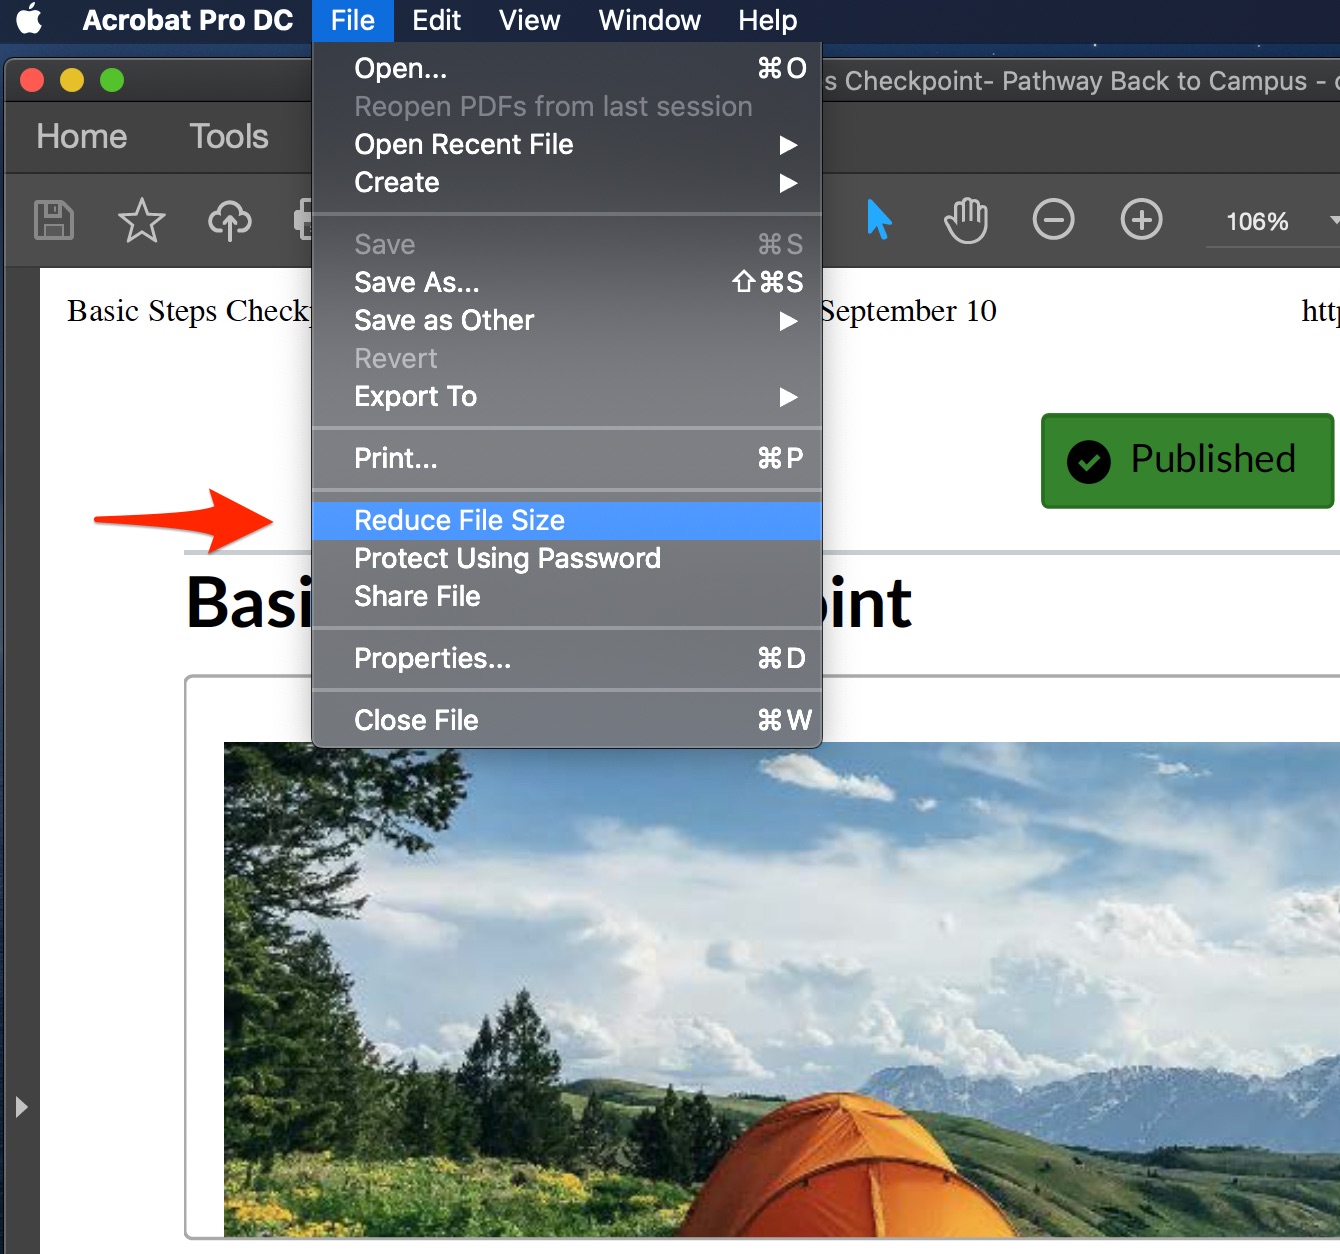
PDF file size should be less than 2-5MB to make the download process easy for students. Here are some common methods to reduce your PDF files:
- All full-time DU staff have access to the Acrobat Pro DC. To compress your PDF, go to File -> Reduce File Size (See image below)
- Learn more about how to compress PDF.
- Ensure that your PDF is OCR compatible, this will reduce file size and make the PDF accessible. Do not create PDF files as scanned images, a screen reader will not be able to interpret the content.
- Please contact our library reserves team if you need a book in digital format.
PowerPoint
There are a number of ways to share your PowerPoint files with students.
Make your PowerPoint presentations accessible.
The accessibility checker inspects your slides and reports back errors found, warnings and tips.
Learn more: Make your PowerPoint presentations accessible to people with disabilities
Solution 1: Convert PowerPoint to PDF
If your PowerPoint does not contain video, audio or essential animation, convert it to a PDF. The file size could be decreased by 75%.
- Open PowerPoint
- Click File and select Export
- Under File Format, click PDF
- Press Export
- Post PDF within your Canvas course or upload to DU OneDrive account and link to it.
Solution 2: Create or upload your PowerPoint using DU Office 365
- Go to DU Office 365
- Click the PowerPoint icon on the left menu
- Create your PowerPoint
- Save your PowerPoint to DU OneDrive
- Click File -> Share -> Send Link
- Copy the link into Canvas as an external link
Advantages to using OneDrive to store your PowerPoint presentations
- All audio and video content is able to be played as intended
- All transitions, animations and GIF’s are still active
- The presentation can be linked with the Office365 tool directly into Canvas
- Does not contribute to your Canvas Course capacity
- Practically an unlimited amount of available storage space (1 TB)
- When a file is updated in OneDrive, it will update within any linked content as well
- Disadvantages to using OneDrive to store your PowerPoint presentations
- Possible download issues for students with slower internet if the PowerPoint is large
Solution 3: Compress pictures in your presentation
- Select a picture in your document. The Picture Format tab appears.
- On the Picture Format tab, in the Adjust group, select Compress Pictures.
- Under Compression options, do any of the following:
- Make sure that Apply only to this picture is not selected so that the changes you make here will apply to all pictures in the document.
- Select Delete cropped areas of pictures. This option removes the cropped picture data but note that if you delete the cropped picture data, you won’t be able to restore it.
- Under Resolution, select Use default resolution.
Learn More About Photo Compression with PowerPoint
Solution 4: Convert PowerPoint to a Video using Kaltura Capture
Turn your PowerPoint into a video with voice narration. Kaltura Capture is available in all Canvas courses and will NOT take up any Canvas storage because Kaltura Capture has its own file storage system. Learn more about Kaltura screen and webcam recordings.
Images
How to reduce large image size:
- Use a screen capture program: Many screen capture programs (TechSmith Capture, Evernote Skitch, Snip & Sketch on Windows 10) allow you to adjust the quality.
- Try using a free online image editor to reduce file size. Here is one free service called Reduce Images.