All video and audio files uploaded to Kaltura My Media within Canvas or DU MediaSpace will have an Auto Speech Recognition (ASR) closed caption file. The video owner or editor can edit the closed captions to improve accuracy. Captions should be close to 99% accuracy. This article describes how to edit captions. ASR captions can take double the time of your video or audio file to be produced. The screenshots below illustrate how to edit captions in My Media within Canvas and the process is very similar within DU MediaSpace.
This article includes:
- Caption Editor Overview Video
- Upload or Import Video
- How to access the video closed caption editor
- Zoom and closed captions – Order new captions
- The Closed Caption Editor
- How to Remediate Captions
- The Interactive Transcript
- The Closed Caption Display Options
- How to Download .SRT
- How to apply closed captions in other languages
- How to improve ASR captioning quality
Caption Editor Overview Video
Upload or import Video
All Zoom cloud recordings, upload videos from your computer or imported YouTube videos are able to have auto closed captions within our Kaltura video system. The following screenshot illustrate how to add a new item.
How to access the video closed caption editor
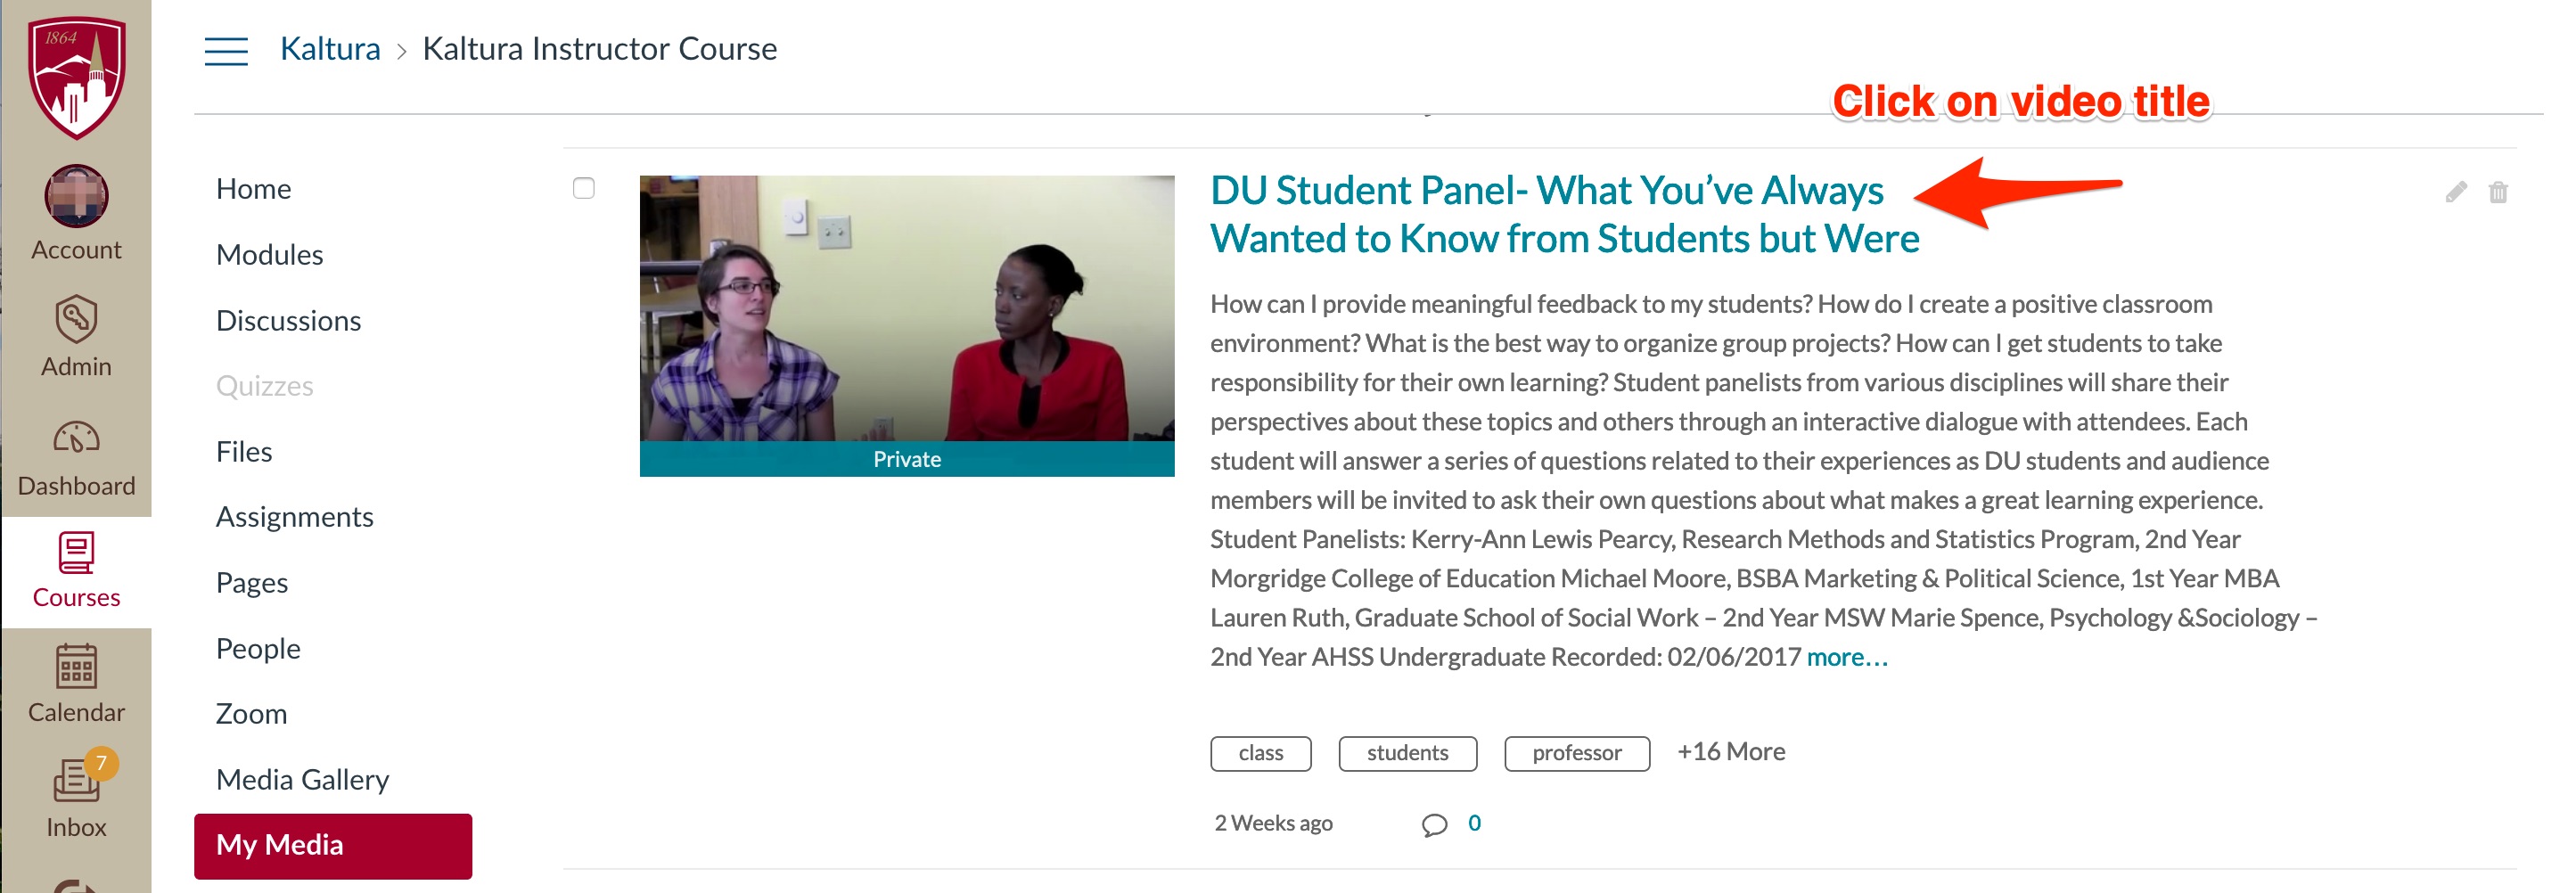
Within Canvas, go to My Media and select the video you wish to edit. Click the title of the video. Within DU MediaSpace (https://mediaspace.du.edu), login and go to My Media and click the video you wish to edit. Click the title of the video.
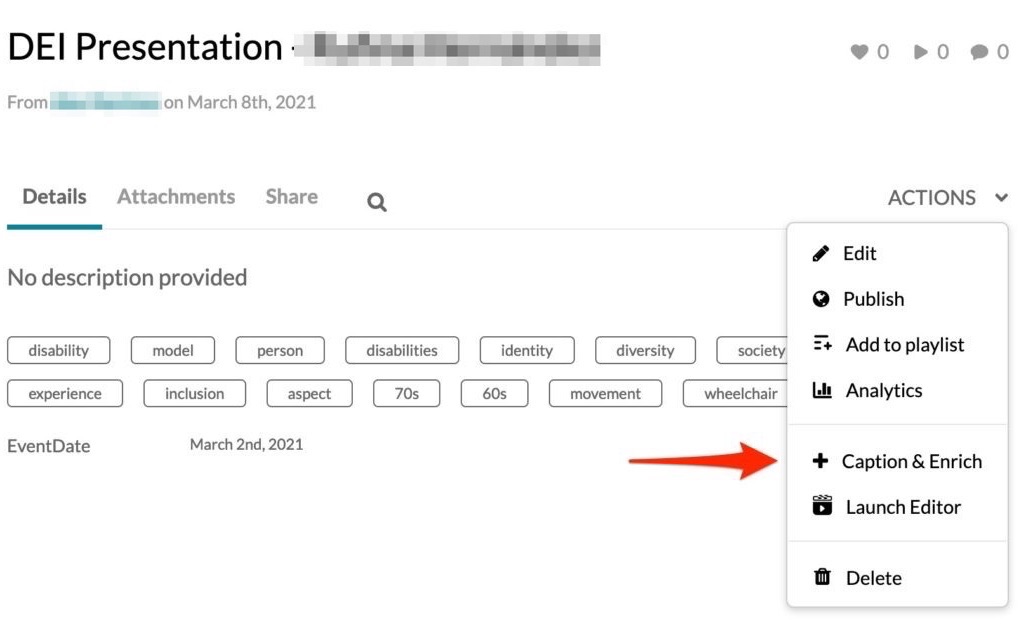
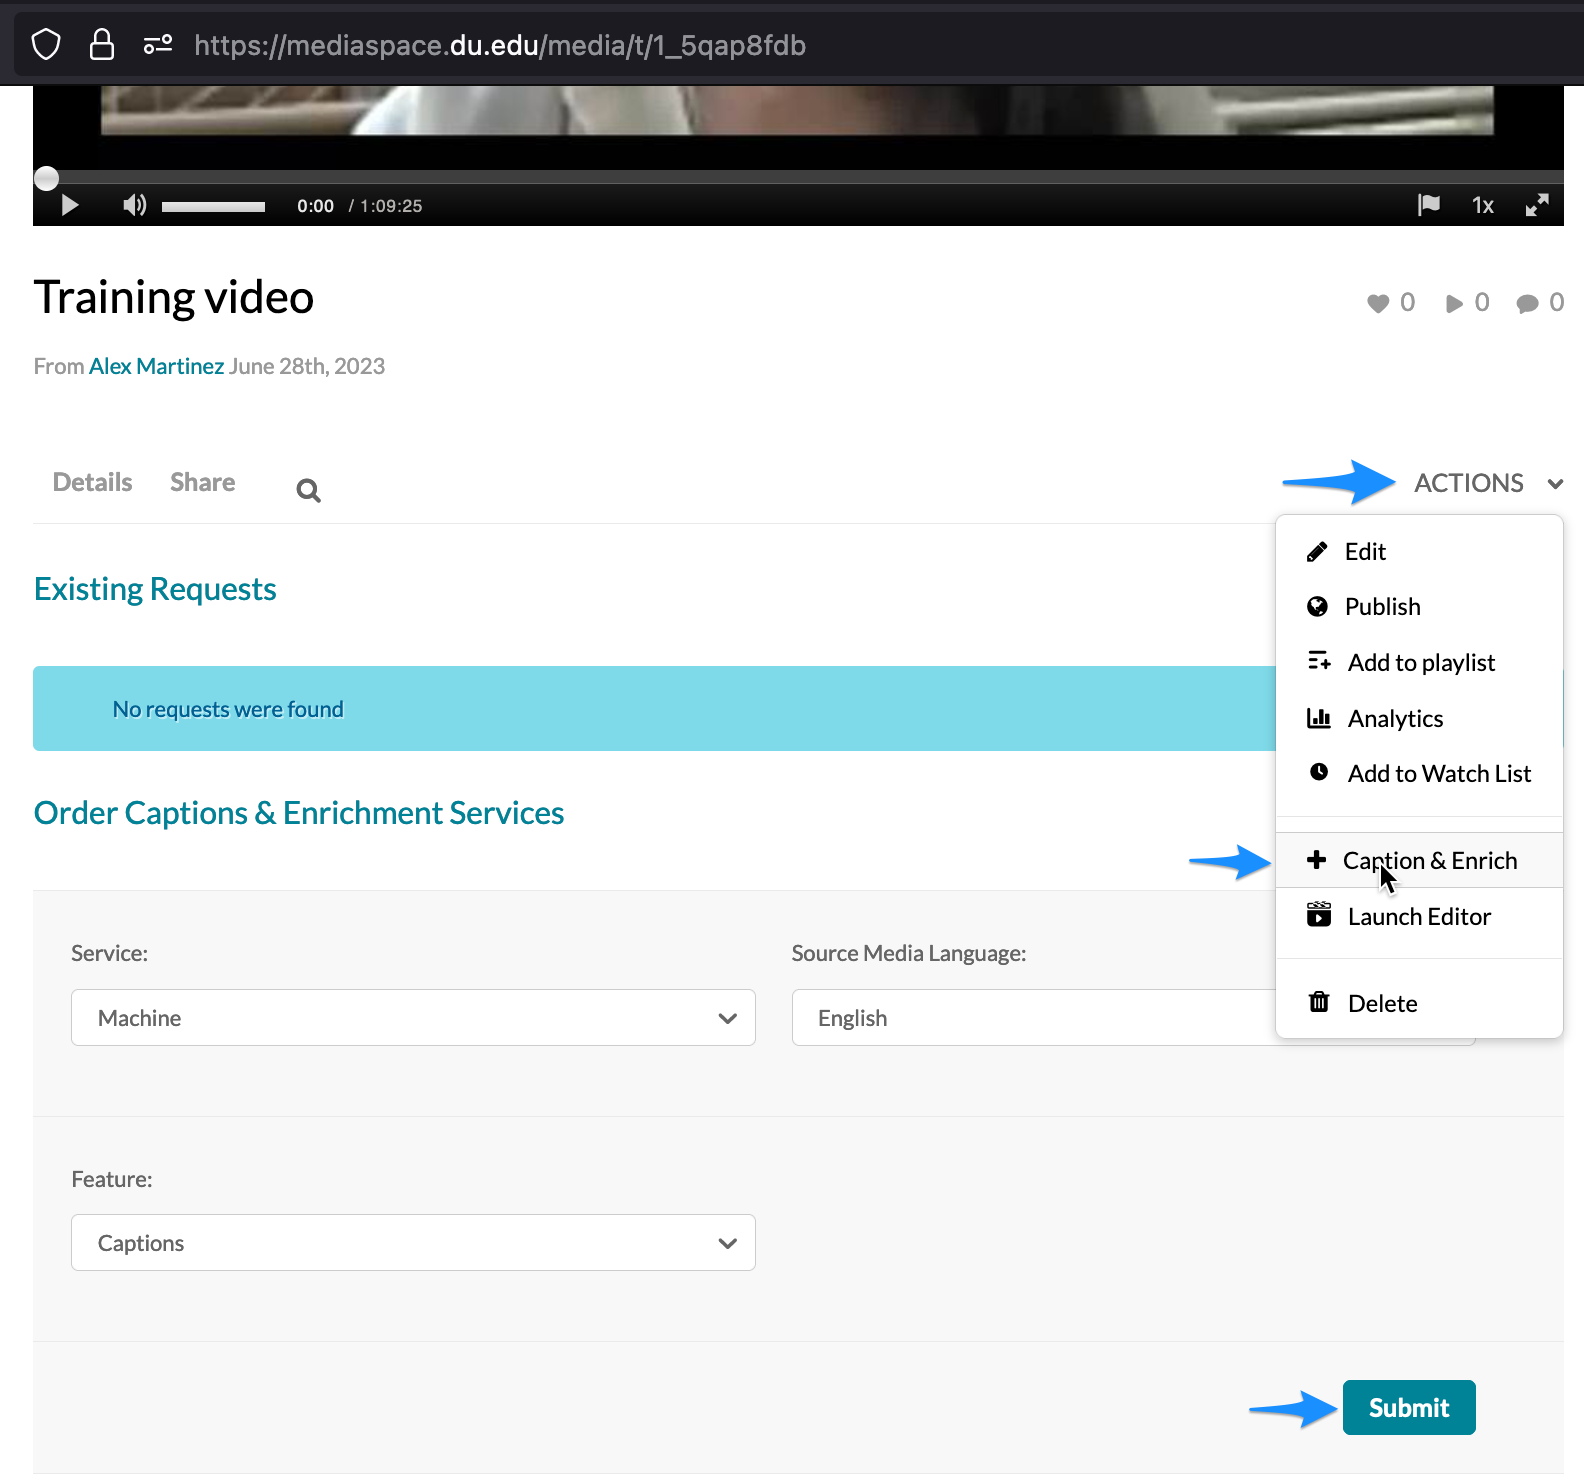
Once your on the main video page, scroll down to the Actions menu and select Captions & Enrich option.
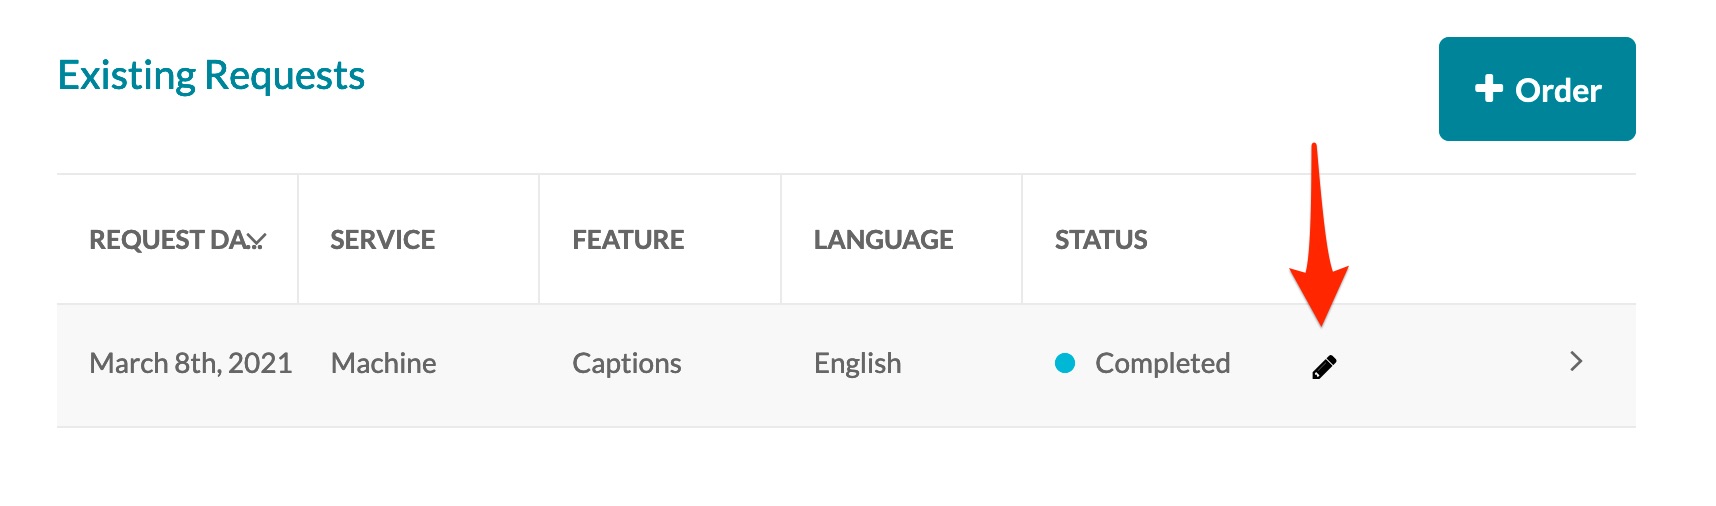
Click on the pencil icon to open the closed caption editor.
Zoom Recording and Closed Captions
All DU Zoom cloud recordings are sent to DU MediaSpace after each meeting. Zoom closed caption files (.VTT) are not always available, accurate and sometimes very difficult to read.
We recommend that you enable DU MediaSpace to re-create new closed captions to help improve accuracy and readability.
If you do request new captions, this is a free service but it might take up to 1 hour for new closed captions to be generated. Once created, we recommend that the old Zoom vtt captions be deleted.
The Closed Caption Editor
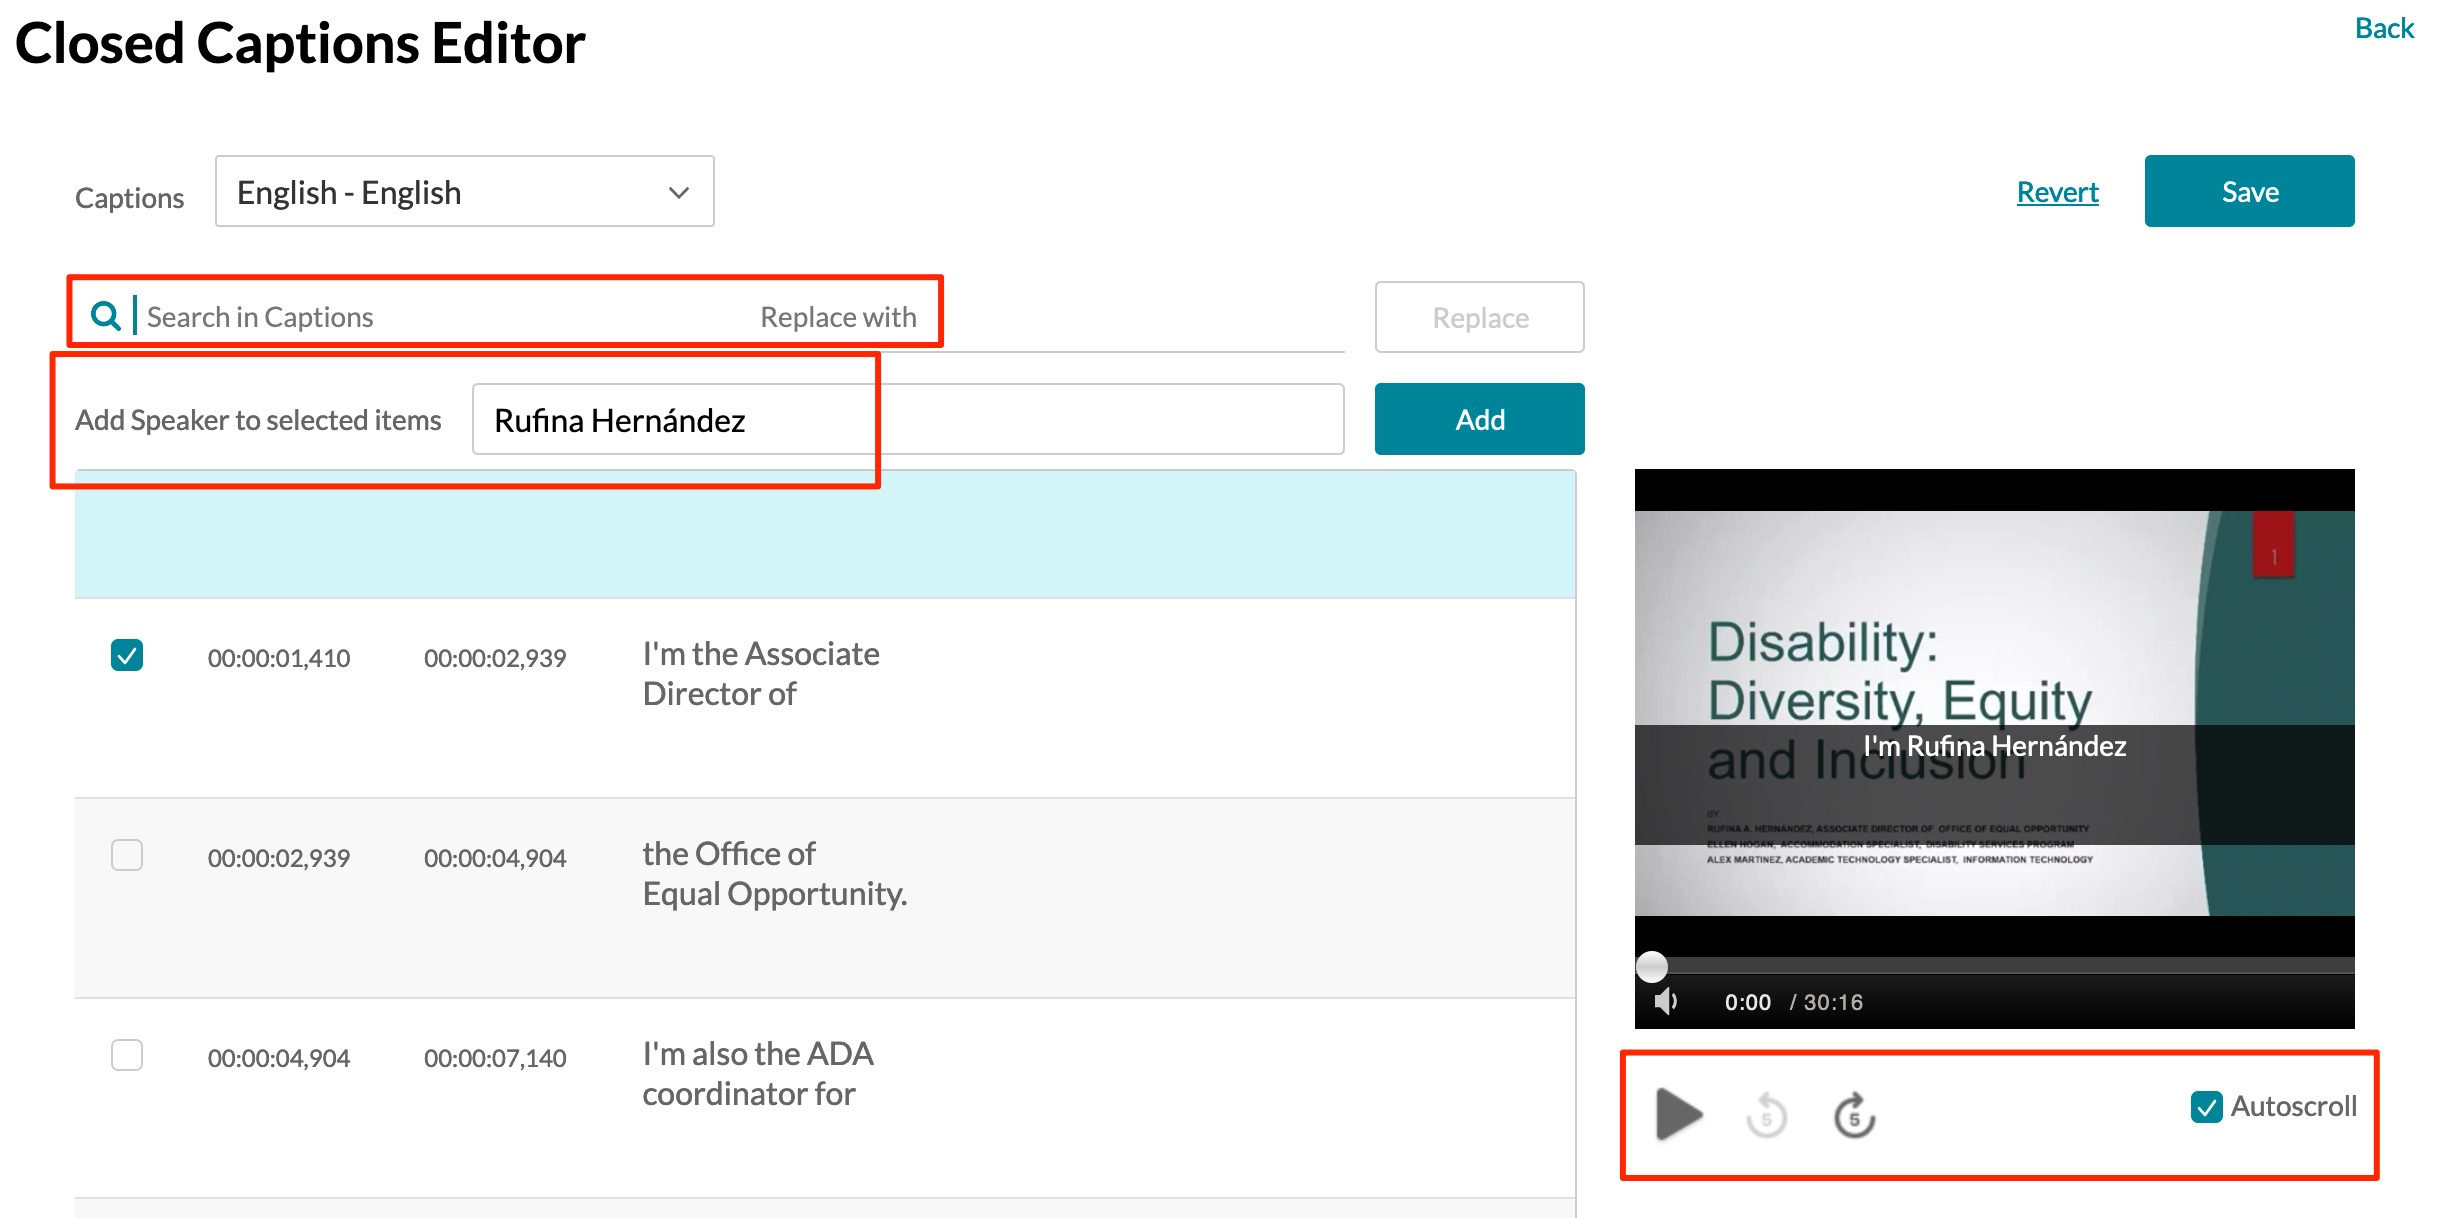
As the video owner or editor, you can quickly scan the captions by scrolling down the transcript. This tool offers you the ability to “Find & Replace” and add speaker names. Speaker name information is very important when you have multiple speakers because it helps identify who’s talking. Press Save button to save your changes and then return back to the video.
How to Remediate Captions
Here are some professional recommendations on how to properly remediate captions:
- Ensuring that speaker names and locations are spelled correctly.
- Ensuring that grammatical errors such as capitalization and punctuation are corrected.
- Speakers should be identified as they are talking within the captions and transcript.
- Note sound effects in captions.
- Provide a downloadable transcript when possible. Required for important campus-wide & public events.
- Provide remediated captioning within 24 hours for urgent campus-wide communication done via video communication.
The Interactive Transcript
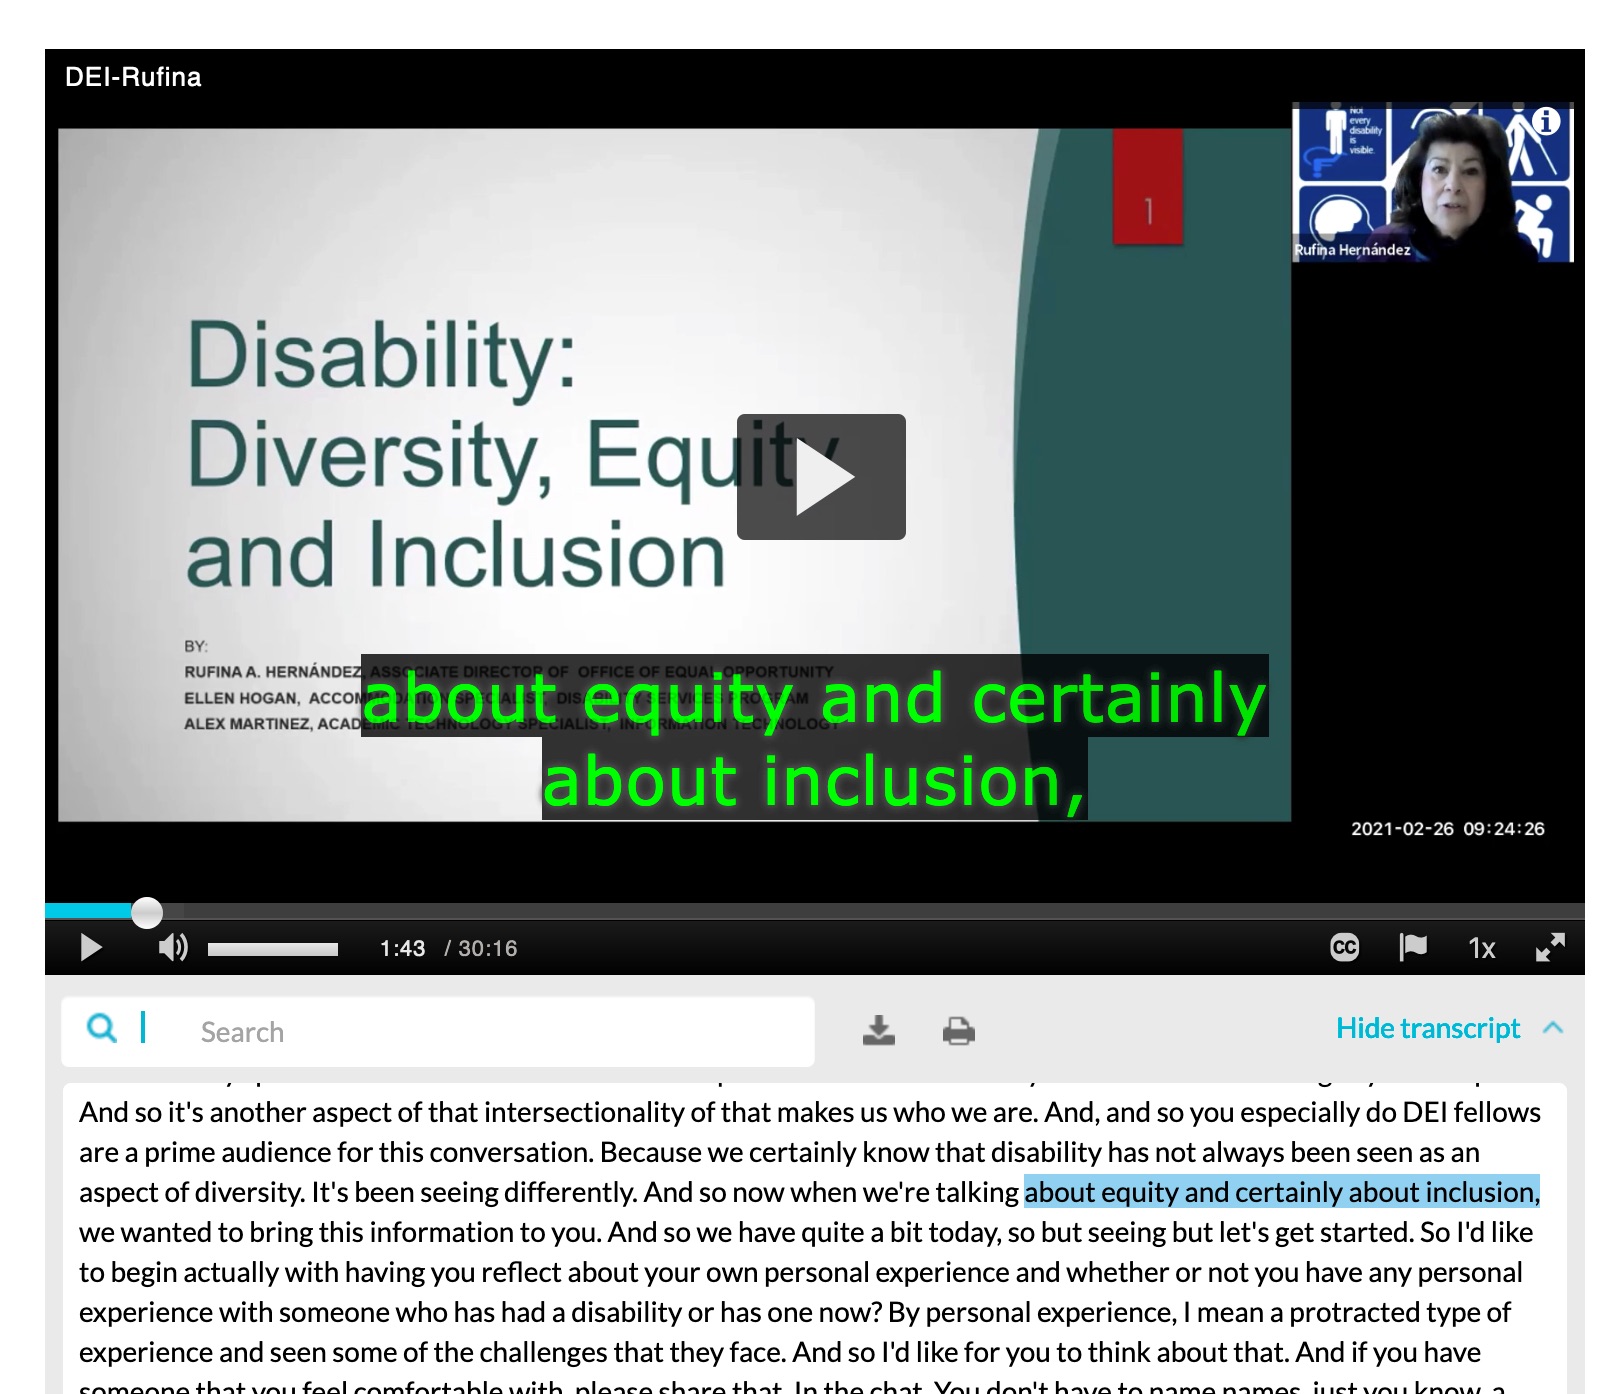
Along with the close captions, an interactive transcript is also provided below the Kaltura video player. A user can click View Transcript to open up the transcript window. The user can also download the transcript file by clicking the download icon. Any updates made to the close captions will automatically update the transcript file.

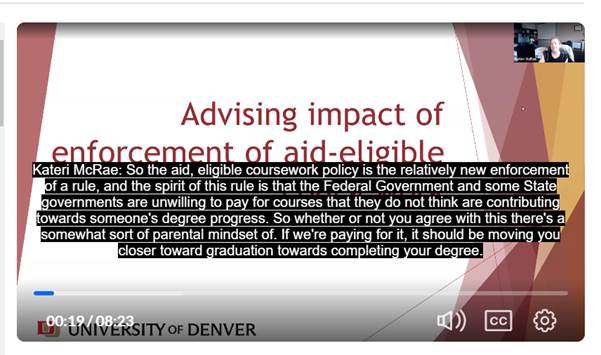
The Closed Caption Display Options
Video viewers can click on the video player CC button and select Options to modify the close caption font size, color, and background.
How to Download .SRT
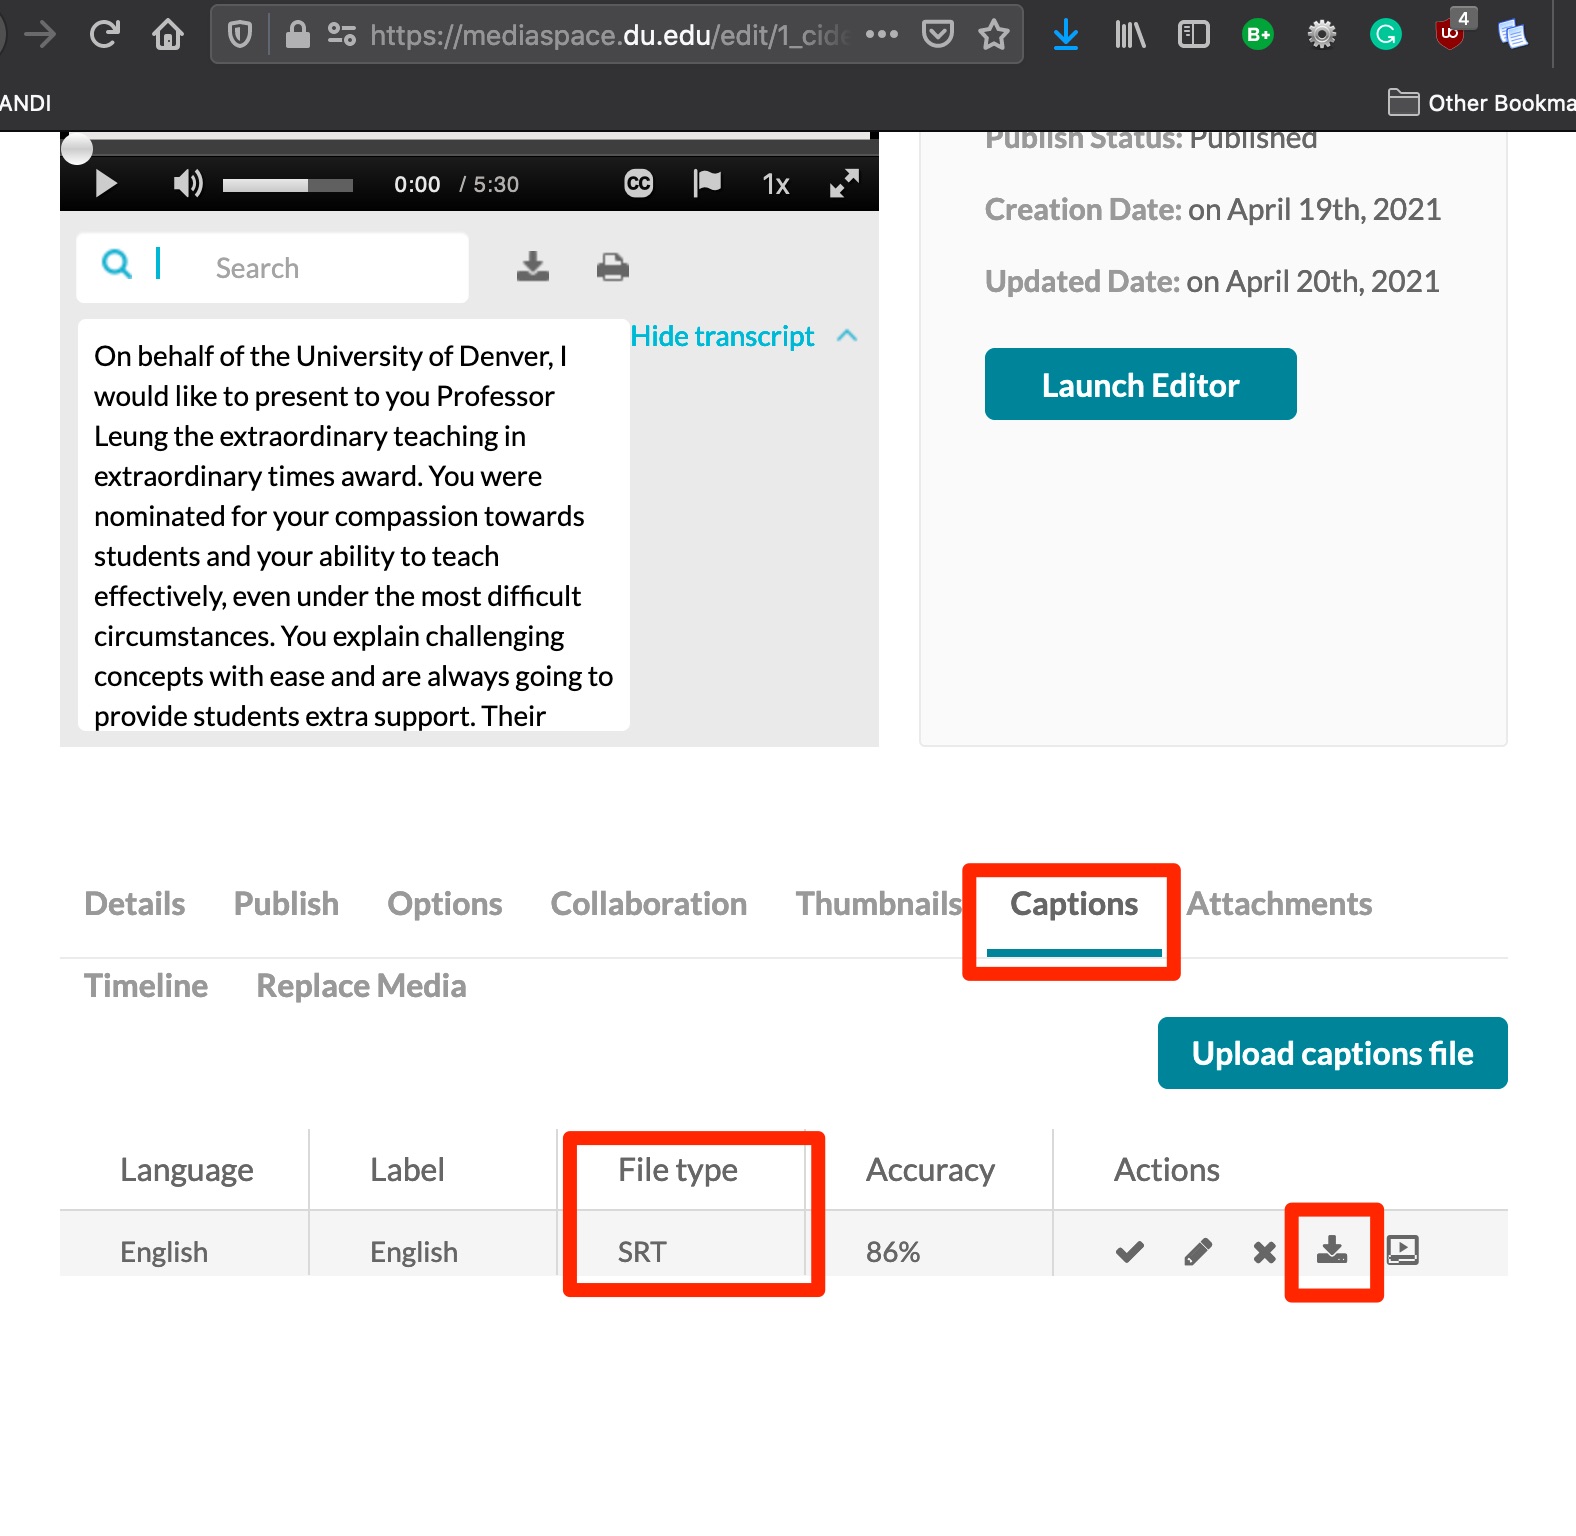
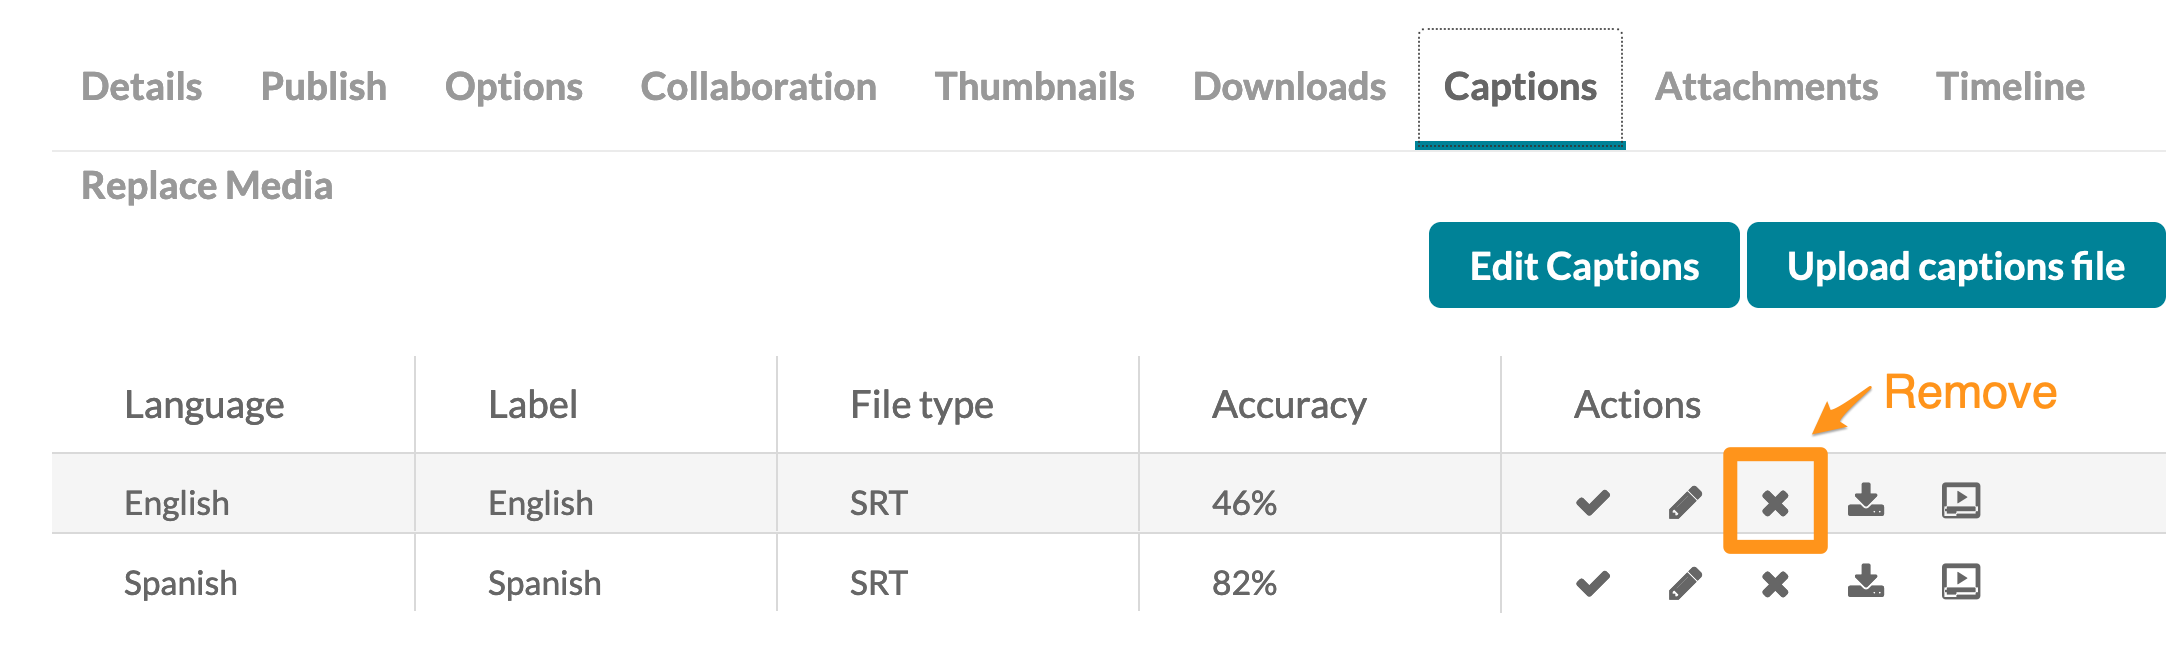
If you need to download the closed caption file (.SRT), go to your video/audio entry, click Edit -> Captions -> click the download icon.
How to apply closed captions in other languages
Kaltura also provides the ability to apply closed captions to various languages. The following source languages are available for auto machine closed captions:
English, Arabic, Cantonese, Dutch, French, German, Greek, Hebrew, Hindi, Hungarian, Indonesian, Italian, Japanese, Korean, Mandarin Chinese, Polish, Portuguese, Romanian, Spanish, Swedish, Thai, and Turkish
English is the default language with any uploaded video into Kaltura. To generate new closed captions, follow these steps:
- In Canvas, go to My Media and search for your video.
- Click on the video and then select Actions -> Captions & Enrich.
- Click the Order button.
- Under the Source Media Language select the language you wish to apply and press Submit.
- Wait 20-40 minutes for auto closed captions to get applied.
- Once the new captions are created, review and edit if necessary.
- Remove the default English language by clicking the “X” located on the video Edit page.
How to improve captioning quality
- Using a good quality USB connected headset and testing the microphone position can often improve voice recognition and automated captioning significantly. They won’t make a huge difference for technical language or industry specific content but they can help some with folks who have accents.
- Avoid talking over each other during a meeting.
- Avoid talking too fast.
- The investment in buying a USB headset can save time and resources for caption remediation.