Our University paid version of ZOOM allows you to record your computer screen and voice to create a video that you can share with others via Canvas or a private web link. In this tutorial, we will illustrate how to use the ZOOM Cloud Recording option to record a presentation and share the video with someone.
This article covers:
- Using Zoom to record a video presentation
- Using the Zoom virtual slides background feature
- How to install and log into your DU Zoom account
- ZOOM Recording Instructions
- End Your Recording
- Share Your Presentation
- Related Resources
Using ZOOM to Record a Video Presentation
The videos below illustrates a few different ways to per-record a lecture video.
Using the Zoom Virtual Slides Background Feature
How to install and log into your DU Zoom account
The free version of Zoom has limited features. For example, the free version does not allow for cloud recordings and has limited time restrictions. To get the full version of Zoom, go to http://udenver.zoom.us and click the “Download ZOOM” option.
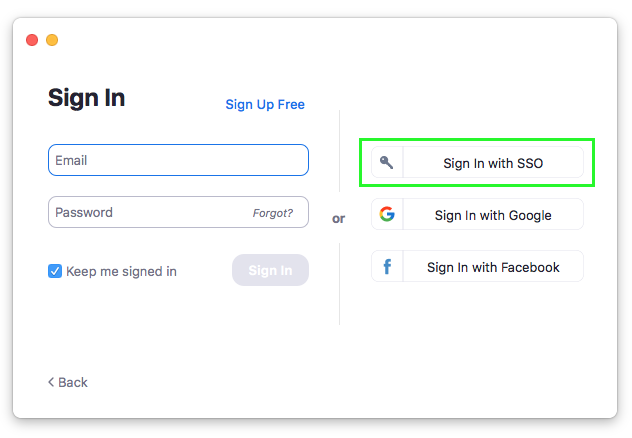
After clicking the Download ZOOM option, you will be taken to the software download page. Select the “Sign In with SSO” option, this will allow you to use the fully functional paid university version of ZOOM.
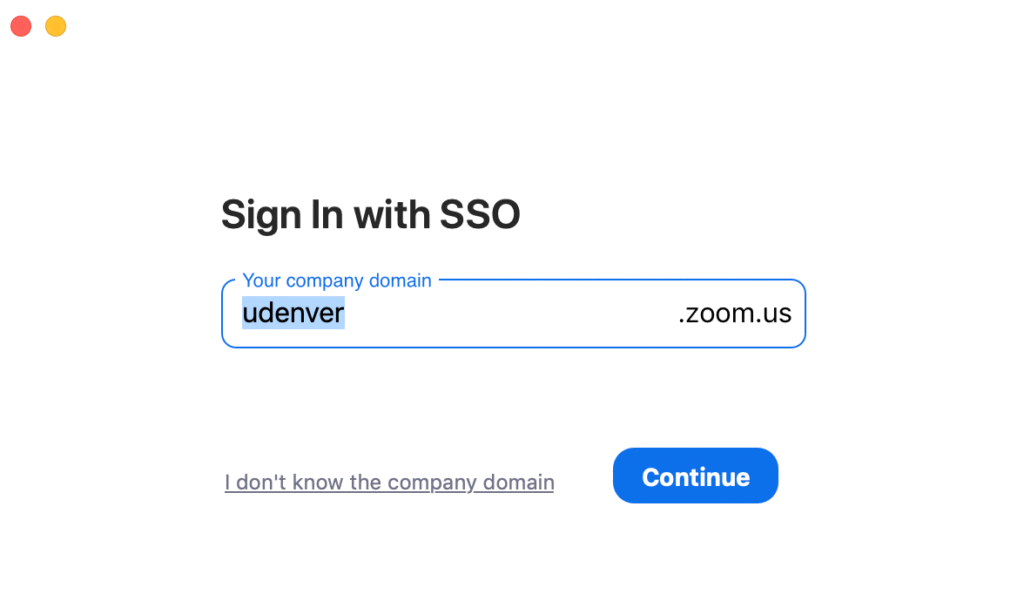
Type in udenver in the box.
Sign In with SSO – Company domain
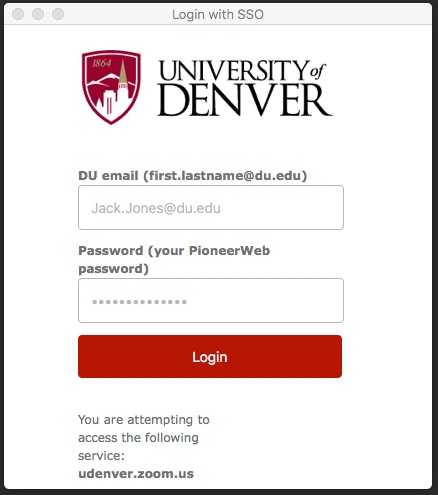
A new window will open in your browser. Type in your DU email and password and click “Login.”
ZOOM Recording Instructions
Click “New Meeting” This will open a new window and start your webcam video.
Click the Record button and select “Record to Cloud” option; you are now recording. If you wish to post your video on YouTube, Vimeo or some other video sharing website, click “Record on this computer“, ZOOM will make a mp4 file after you end your ZOOM meeting.
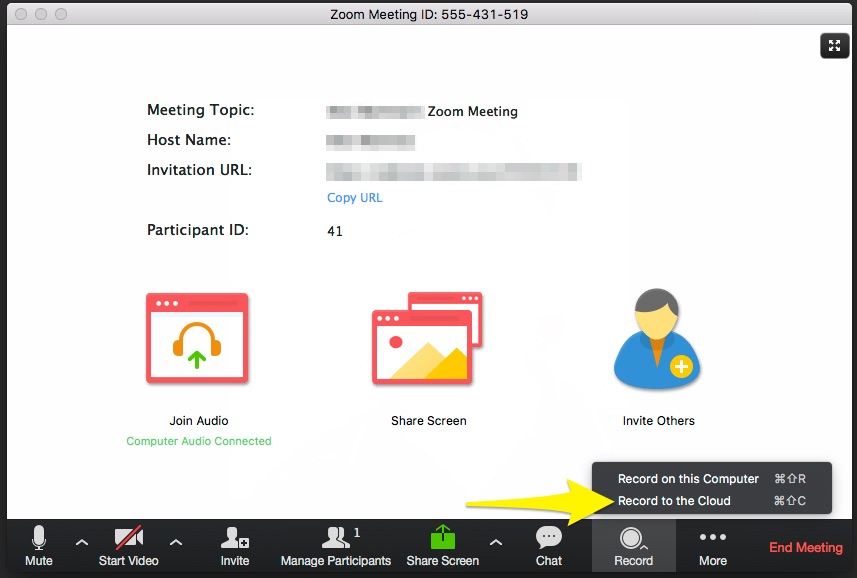
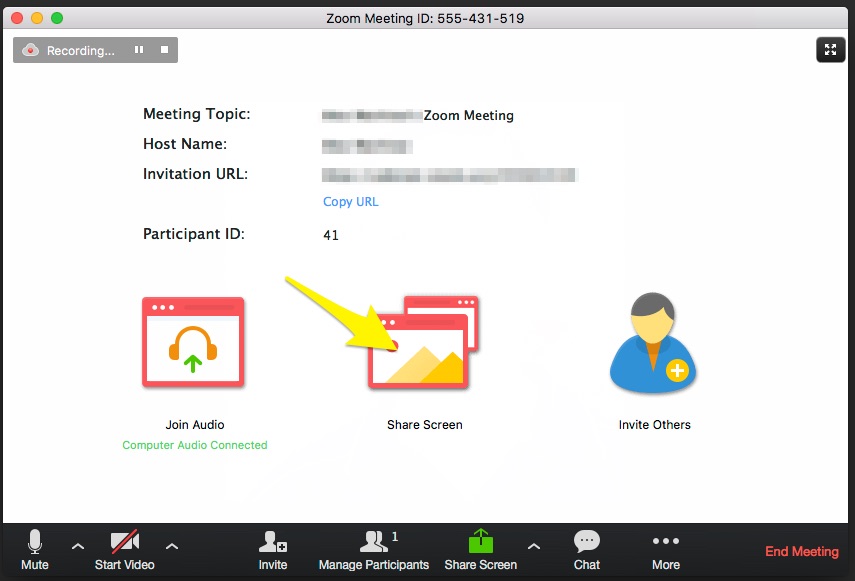
To record your computer screen, click the “Share Screen” icon in the middle of the Zoom window. Select your main screen to record and press the “Share Screen” button.
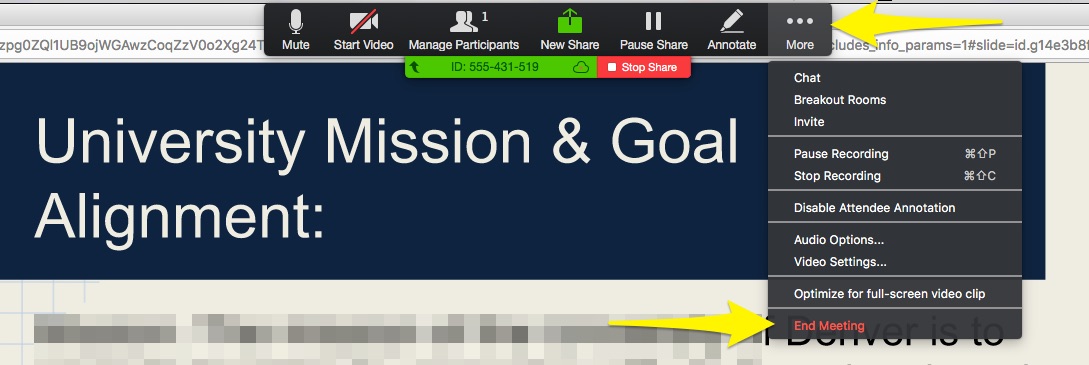
End Your Recording
To end the recording, press the “More” menu option and select “End Meeting“. Press the “End Meeting for All” button. This will end your meeting and start the upload process, so stay connected to the Internet.
Share Your Presentation
If you selected “Record to Cloud“, after your pressed the End Meeting button, your recording will automatically will be uploaded into your DU MediaSpace and DU Canvas My Media account. You should get an email sent to your University email after 20-30 minutes.
If you selected “Record to this Computer“, after your pressed the End Meeting button, your recording will be saved on your computer. ZOOM recordings are saved in a folder called ZOOM within your documents folder. You can upload this mp4 file to YouTube, Vimeo or some other video sharing website.
Related Resources
- ZOOM Cloud Recording Settings and Features
- Getting Started with ZOOM Tutorials
- ZOOM Video and Audio Settings
- Sharing you Zoom via Canvas
- Sharing your Zoom recording without any security restrictions as an unlisted video