Last updated on: 1/23/2024
This article covers:
- Overview of recording a Zoom interview video
- What you will need to record the interview
- Zoom download and login instructions
- Scheduling a Zoom meeting
- Recording your interview
- Edit captions and transcript
- Submitting your Zoom interview in Canvas
- Adding comments and attaching documents to your Zoom interview in Canvas
Overview
ZOOM allows you to record your computer webcam and voice to create a video that you can share with others. This article explains how to use the ZOOM Recording feature to record a live interview and share the video recording with your instructor.

What You Will Need
- A computer webcam and microphone
- Internet access
- A quiet room with good lighting
- Non-distracting background – Activate ZOOM virtual background if possible
- If you and your interviewee are both in the same room, the webcam should be placed about 5-10 feet away from the people being interviewed (Speak loud and clear)
- If you and your interviewee are in virtual zoom space, be sure each of you are visible and centered on the screen
DU-2DU Online Students
DU-2DU Online Students: If you are part of the DU online programs who use 2DU as your learning management system (ie; MSW@Denver, MBA@Denver), you can locate instructions on recording an interview video on zoom by downloading the document titled, Student Self Recording Instructions.
If you have questions or need technical support please reach out to 2U tech support directly in 2DU (through chat), email: studentsupport@onlinemse.du.edu or call 855-840-5129 ext 1 or 2 for tech support.
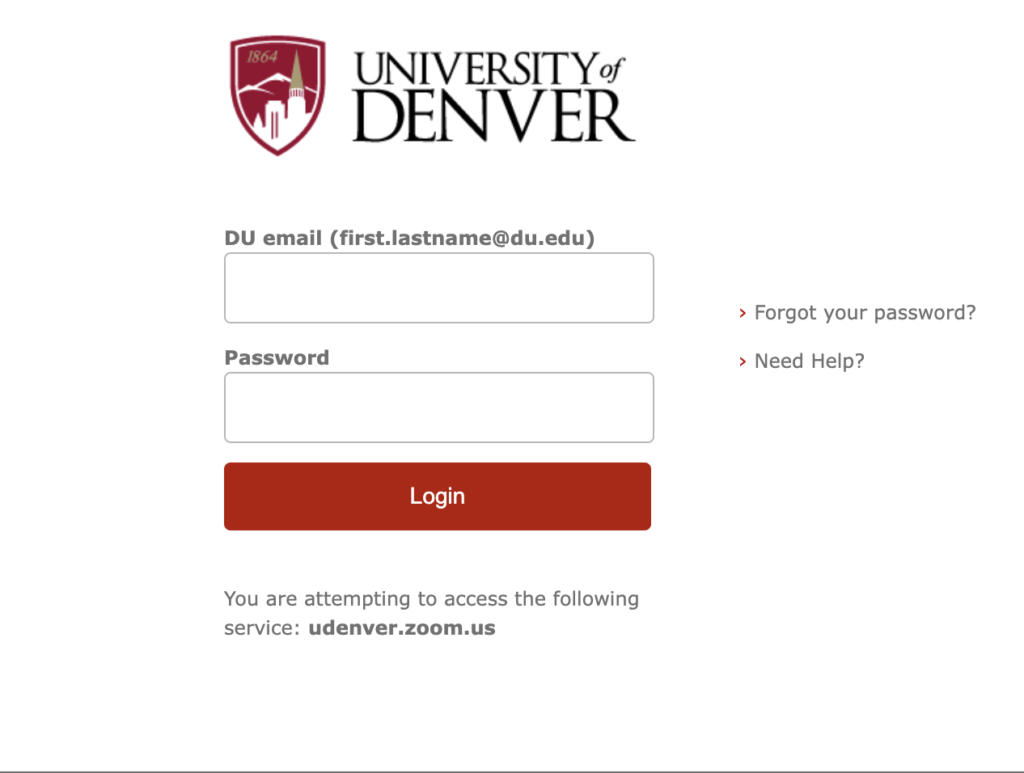
Step 1: ZOOM Download and Login Instructions
- Go to https://udenver.zoom.us and download zoom.
- Click the Zoom client meeting button.
- Login with your DU email and password.
- Activate your webcam by clicking Start with video.


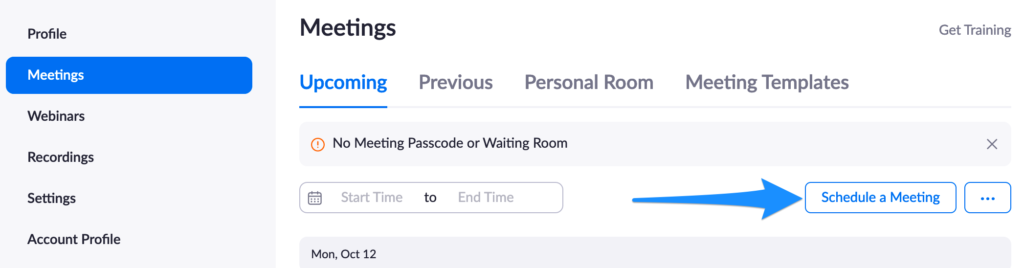
Step 2: Schedule a ZOOM Meeting
- Go to https://udenver.zoom.us -> Login -> Press Schedule Meeting.
- Enter meeting information and save.
- Share invite with interviewee.
IMPORTANT! Check your Zoom Recording Settings to record “Gallery View” layout.
Visit https://udenver.zoom.us and login -> Settings -> Recordings -> Record gallery view with shared screen. Also, make sure the Audio Transcript is turned-on.

Step 3: Recording Your Interview
Once you and your interviewee are ready:
- Start your meeting
- Click Record
- Select Record to Cloud
- To stop the recording, press the stop button or click End Meeting
- Your Zoom recording will automatically be saved to DU MediaSpace and can be found in your My Media


Important! ZOOM allows for Speaker View or Gallery View. Make sure you are in Gallery View (select view in the top right corner of Zoom screen) so the final recording displays a grid layout of the interview

Tip: If conducting a face to face interview make sure to record in a quiet room, the audio is very important! Speak loudly, clearly, and not too fast.
Step 4: Edit Captions and Transcript
Video and audio files will automatically have captions and a transcript created. The closed captions and transcript files are technically the same. This step is automatic but it normally takes double the time of the recording duration. For example, a 1-hour video will require 2 hours for the auto-captions to be created. Learn more about closed caption editing.
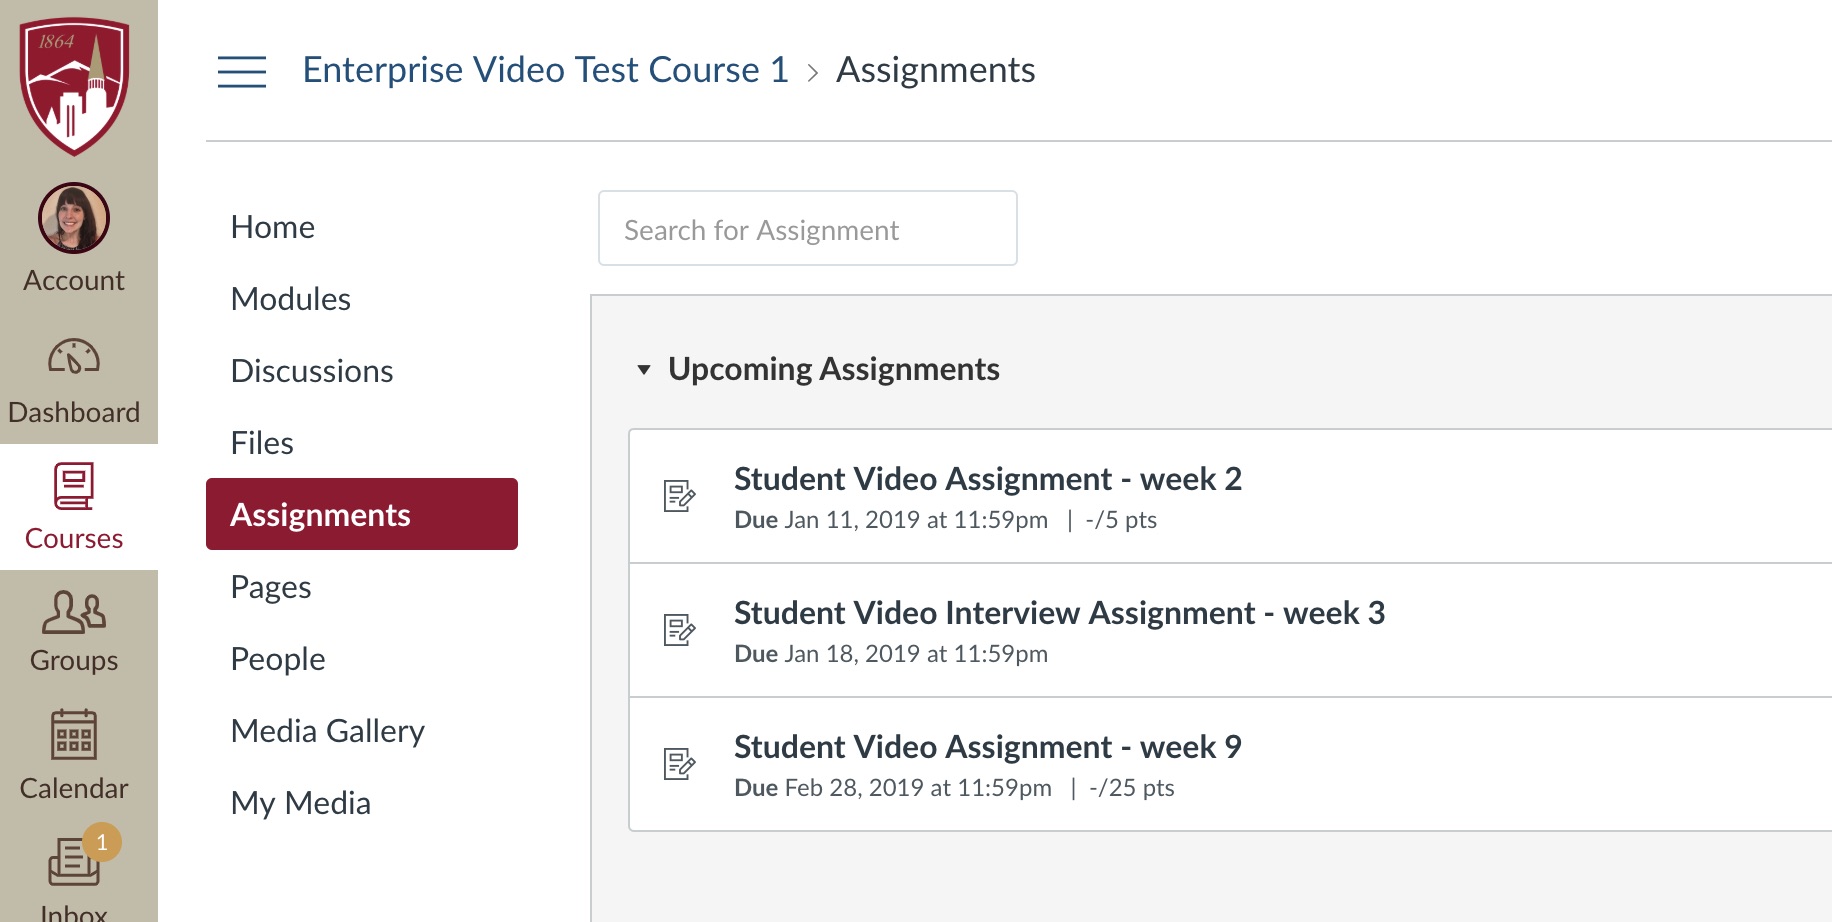
Step 5: Submitting your Zoom interview in Canvas
Your recorded interview has now been saved in DU MediaSpace and can be found in your My Media. You can easily access My Media at DU MediaSpace or from your canvas course.
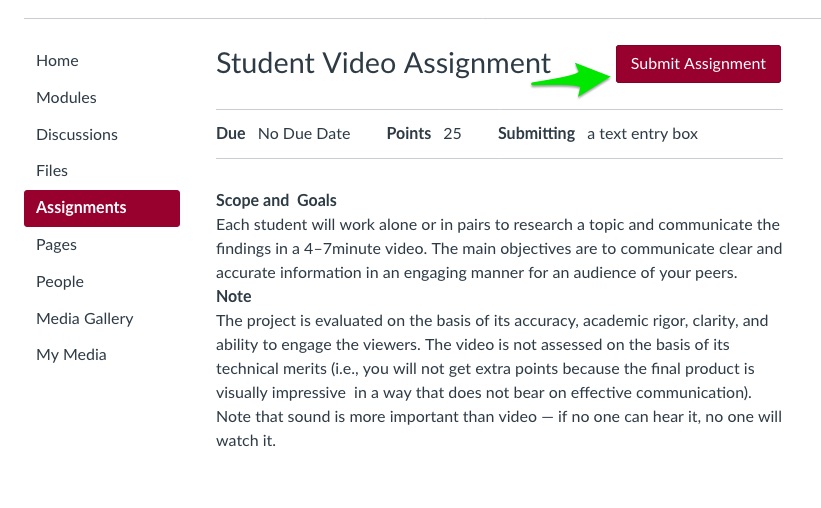
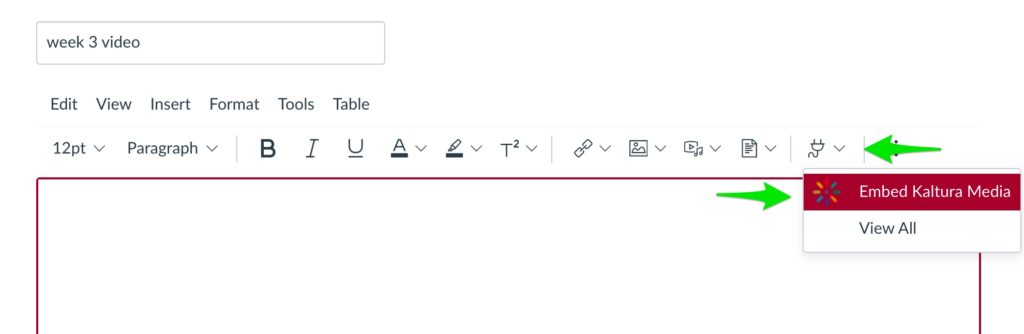
To submit your interview, in your Canvas course click the Assignments tab:
- Select the assignment and click Submit Assignment
- Text Entry window will appear -> Click the Plug symbol -> select Embed Kaltura Media
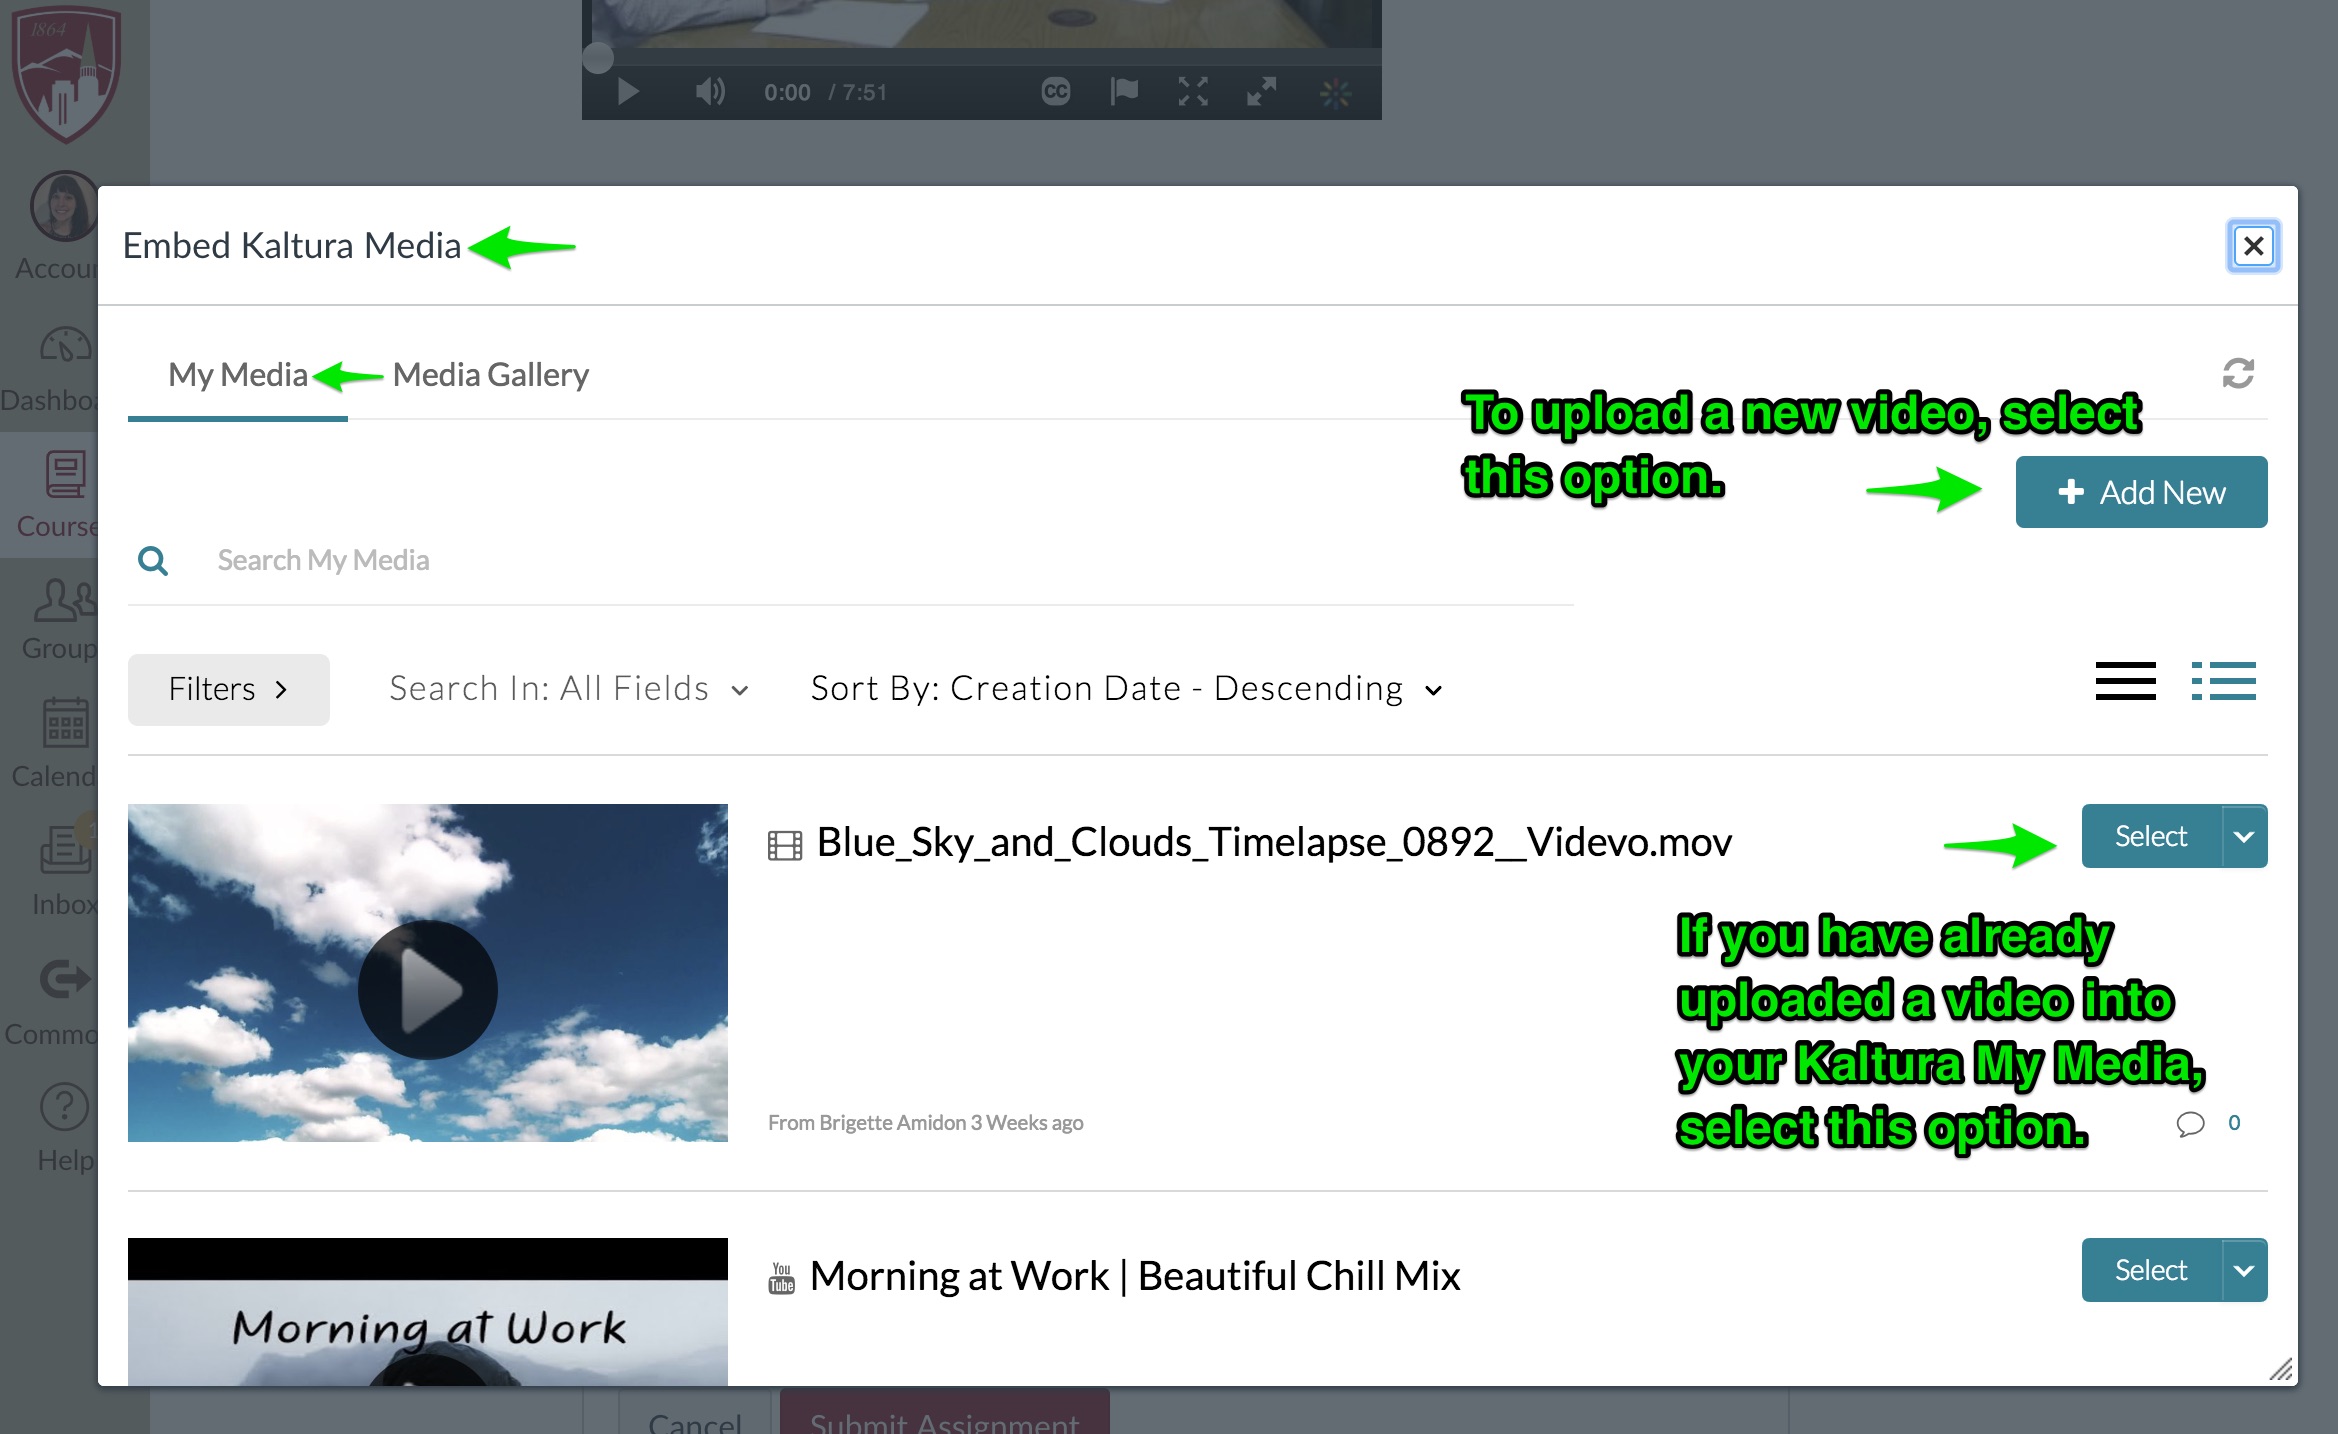
- Select My Media
- See your recording and click the Select button to add your recorded Zoom interview
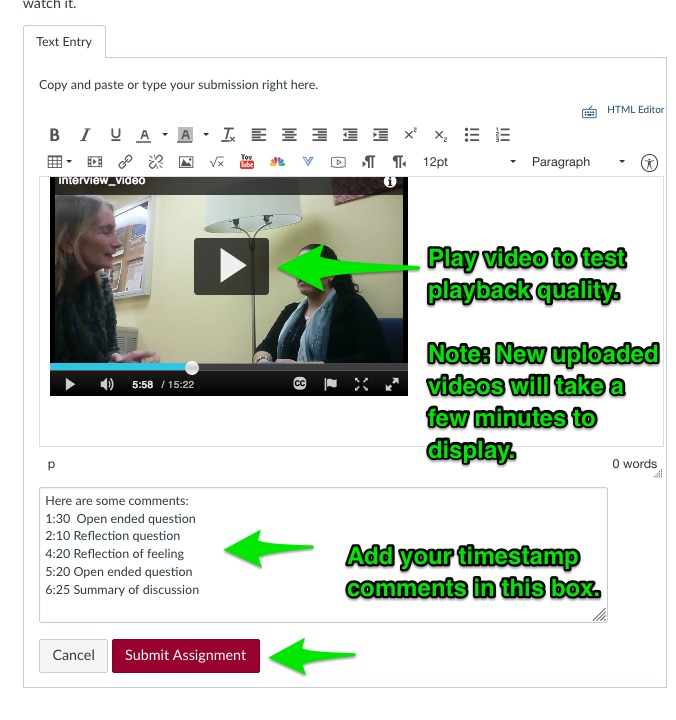
Step 6: Adding comments and attaching documents to your Zoom interview in Canvas
Add any comments you would like your instructor to see in the Comments text box:
- Click the Submit Assignment button
- Add comments in the comments box
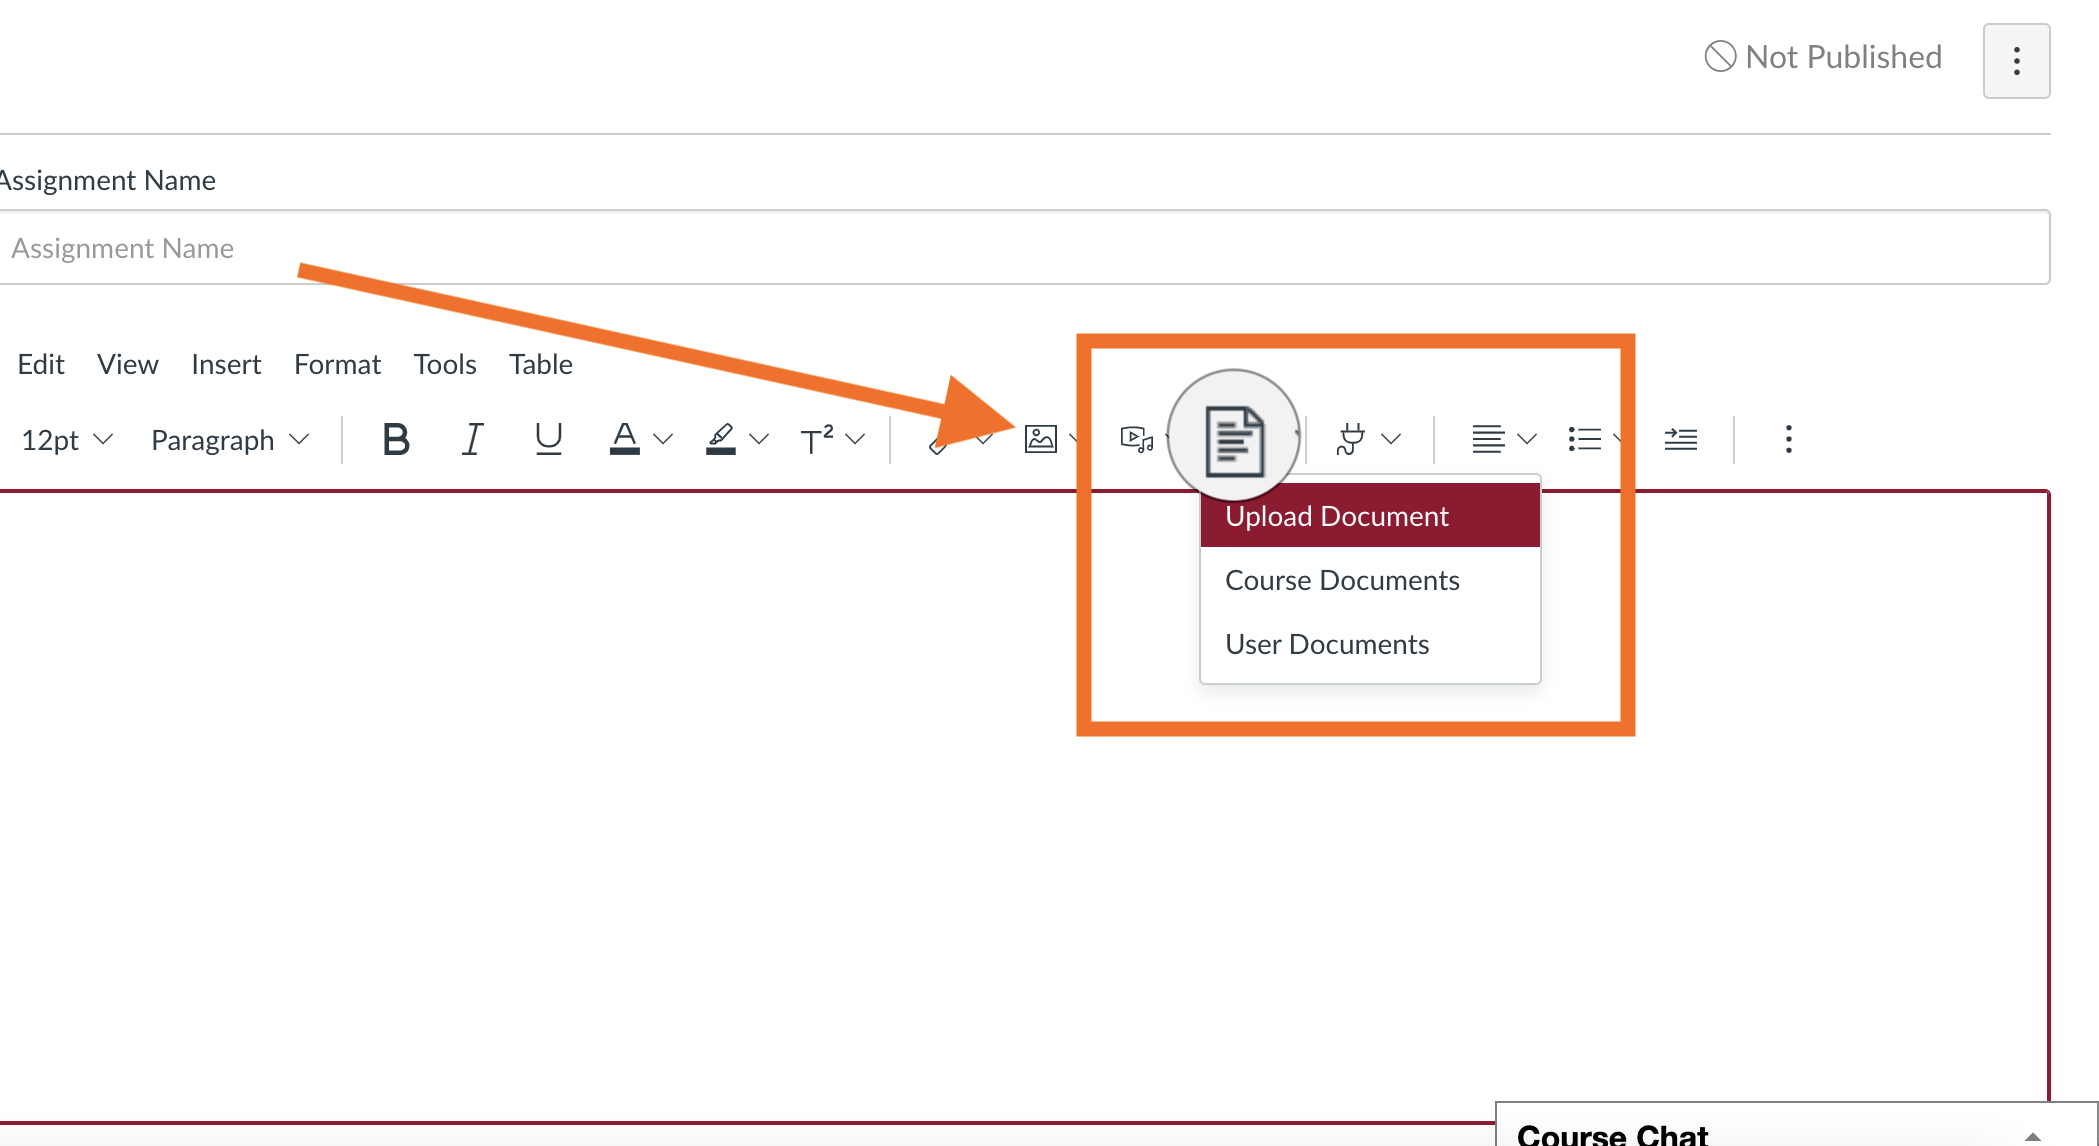
Or you may upload your comments via a word doc using the Upload Document feature.
Related Articles