These instructions are for students that need to record themselves as part of a class assignment.

What you will need:
- Kaltura activated in your Canvas course (instructor responsibility)
- Kaltura Capture, a free software available in your Canvas course.
- A quiet room with good lighting.
- A computer with a webcam and microphone.
- At least 2GB of free storage space on your computer.
- Fast Internet upload speed is highly recommended.
Instructions:
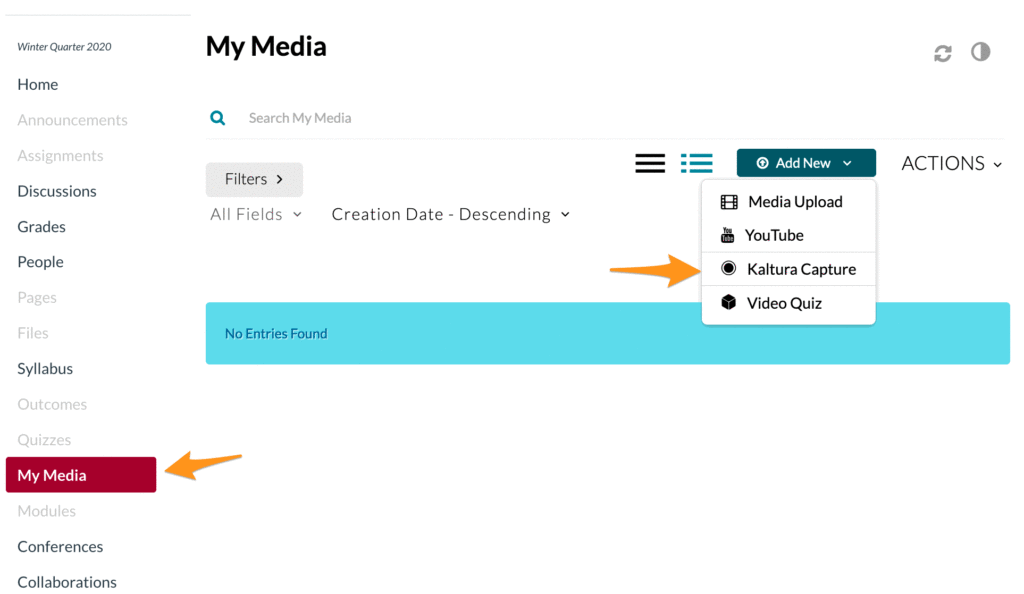
1. Install the free program called Kaltura Capture. Go to your Canvas course and click My Media. On the Add New menu, choose Kaltura Capture from menu.
If you do not see My Media, contact your instructor and inform them that they must activate Kaltura in their Canvas course in order for you to record and share your video.
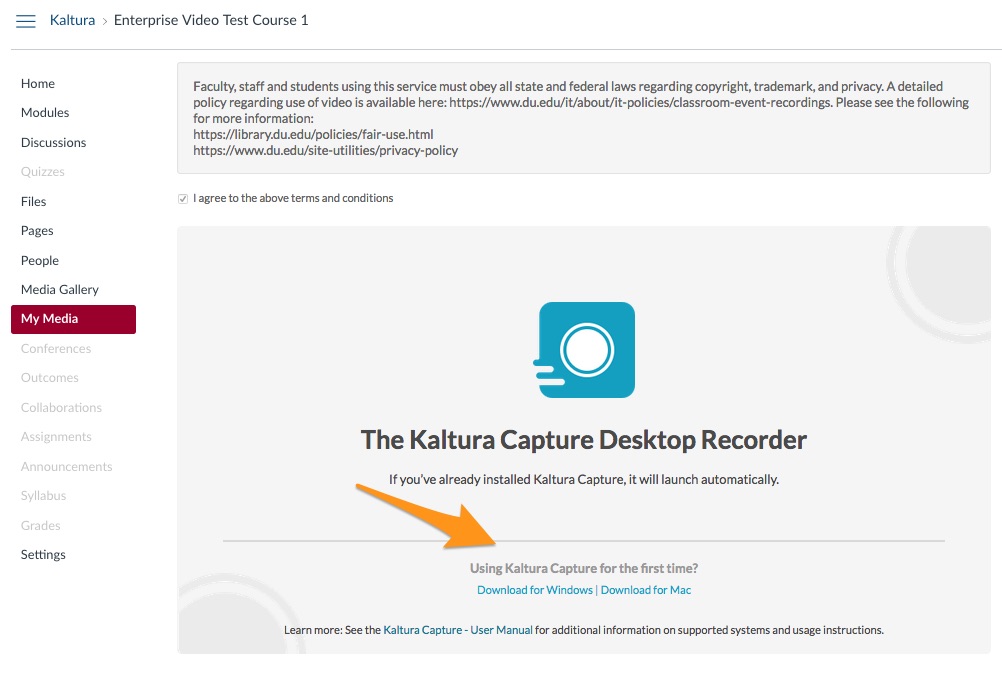
2. You will see terms and agreement statement, click the checkbox after you have read the statement.
3. Click on the Windows or Mac links to start in the install process on your computer. You only need to download and install it once. We recommend that you access the tool in this way, as opposed to using a desktop shortcut to the application.
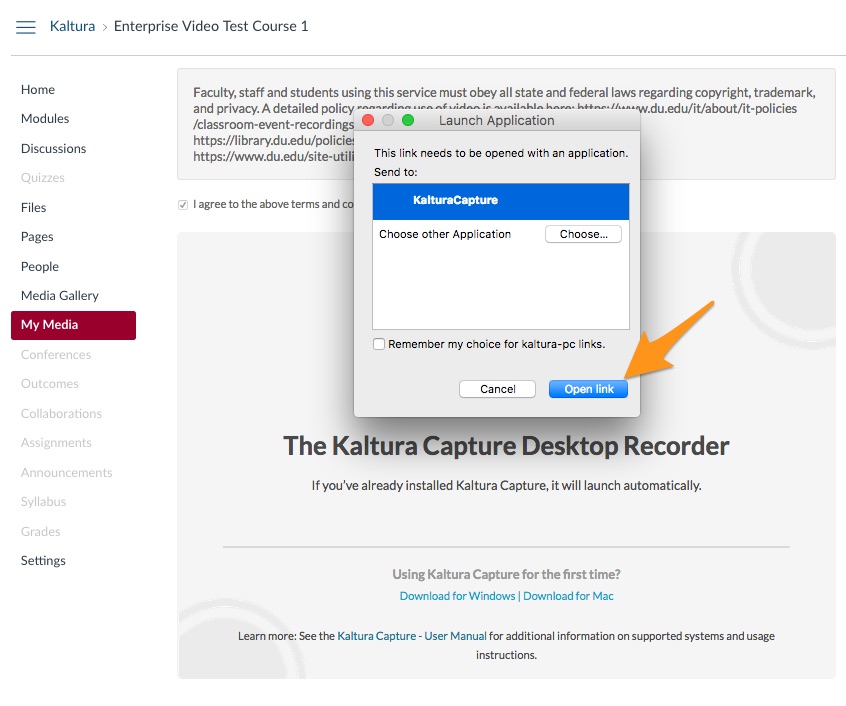
If you can not install or open Kaltura Capture on your computer, please take a look at these instructions:
– Can’t install software on my new Mac computer.
– I get an error message saying 3-party cookies are not allowed.
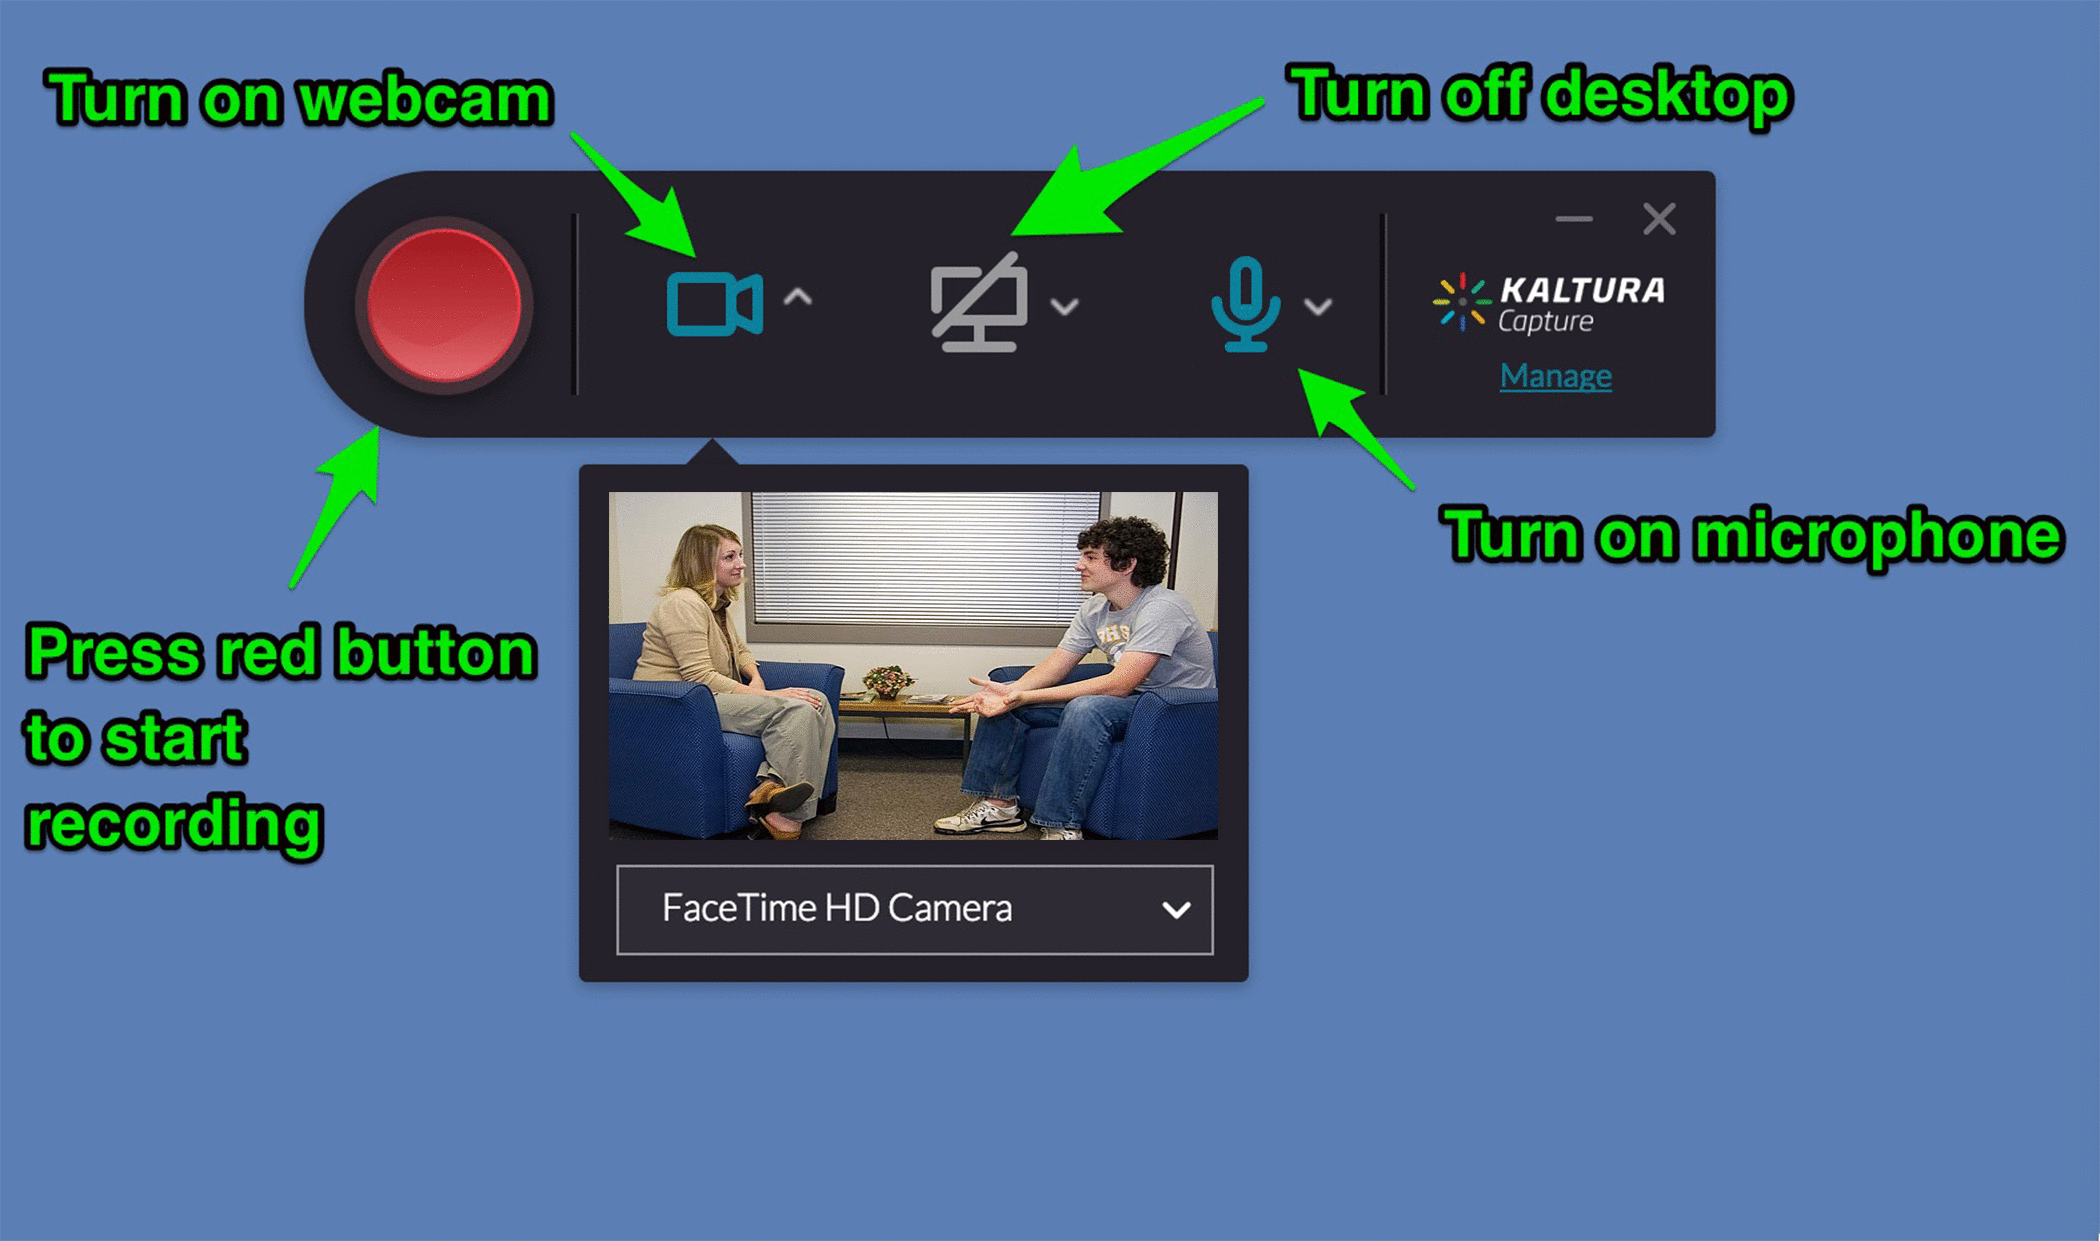
4. After you have installed the software, the application will open up. Turn on webcam and microphone. Make sure to Turn off your desktop recorder for small group interview videos.
Note: Increase the input of your micrphone by adjusting your audio settings. The image below illustraes Mac Settings ->Sound. For PC, follow these instructions. 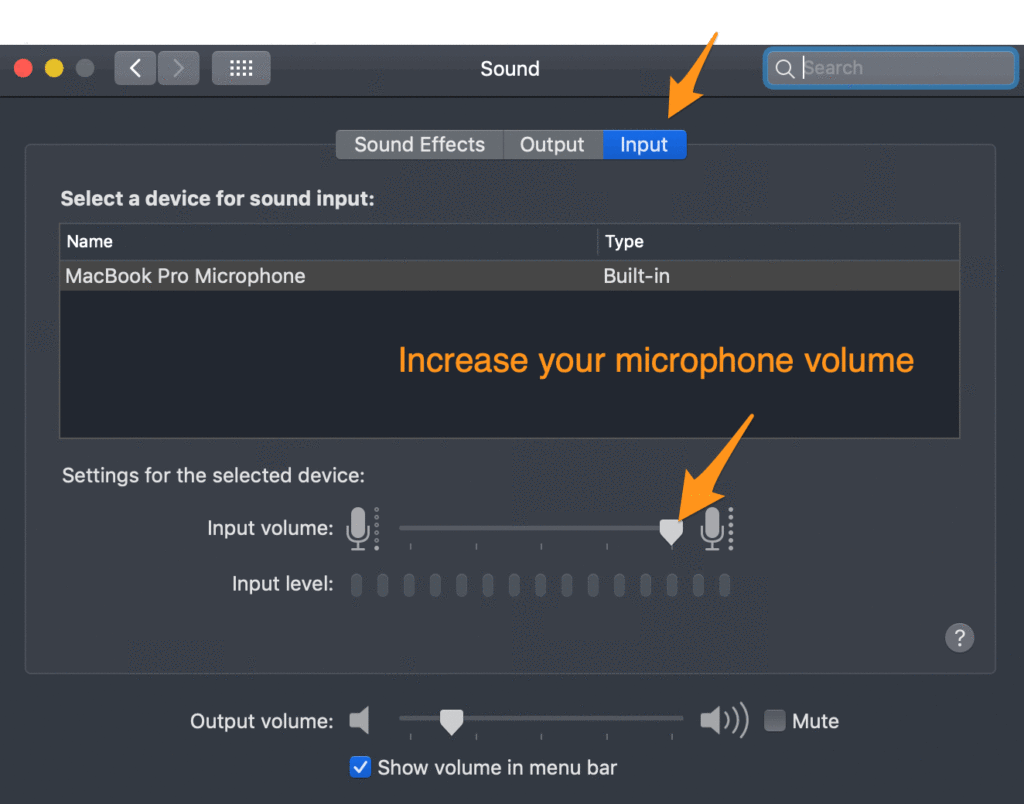
5. Make sure that the webcam is capturing all the people that need to be in the video. The webcam should be between 5-10 feet away.
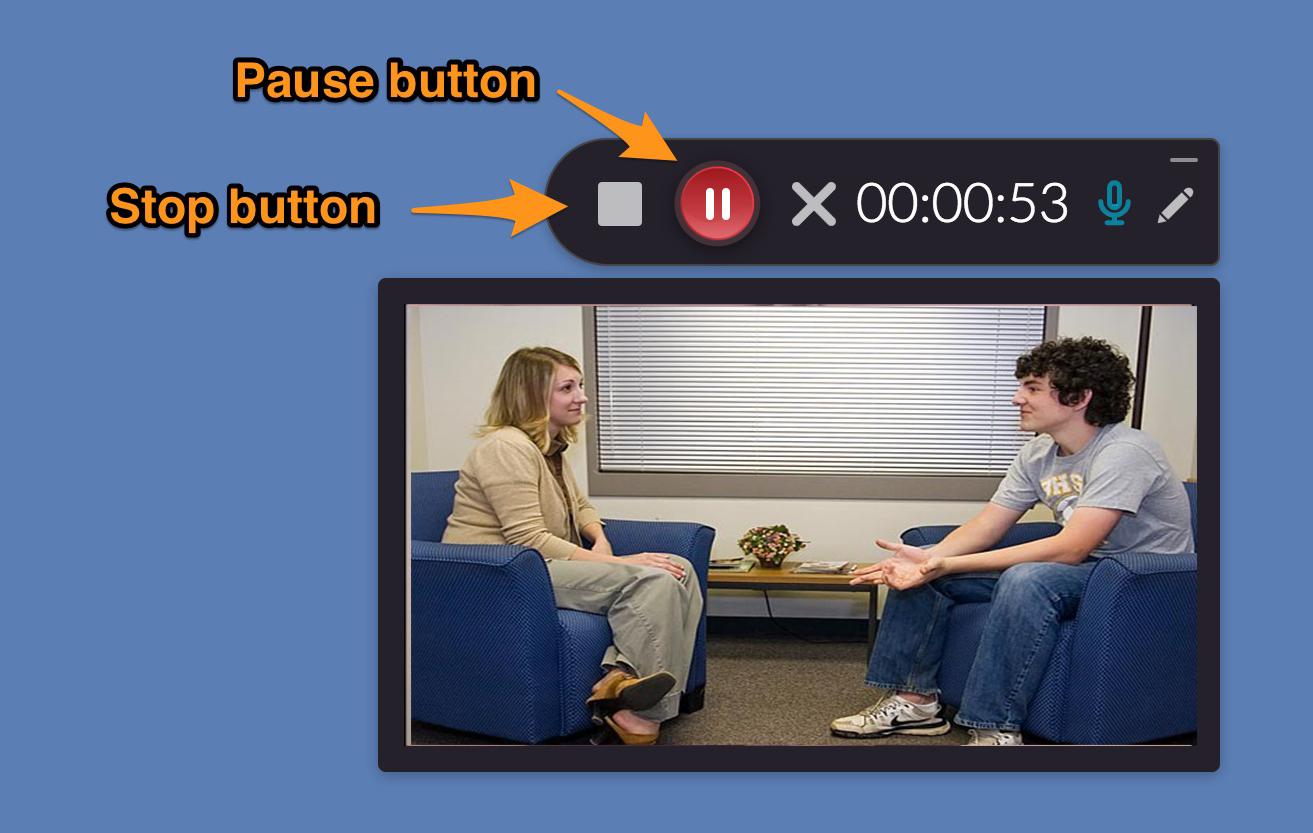
6. Press the big red button get start recording, you will see a 3-second countdown. Speak load so that the audio is well captured.
NOTE: Do a 30-second test recording first to make sure the audio and video sources are good. A local copy is saved by default, and you can play the recording back before you upload it.
NOTE: If you are interviewing someone, you must inform them that the video might be shared with others as part of the class assignment. This statement and the students permission should be include in the video.
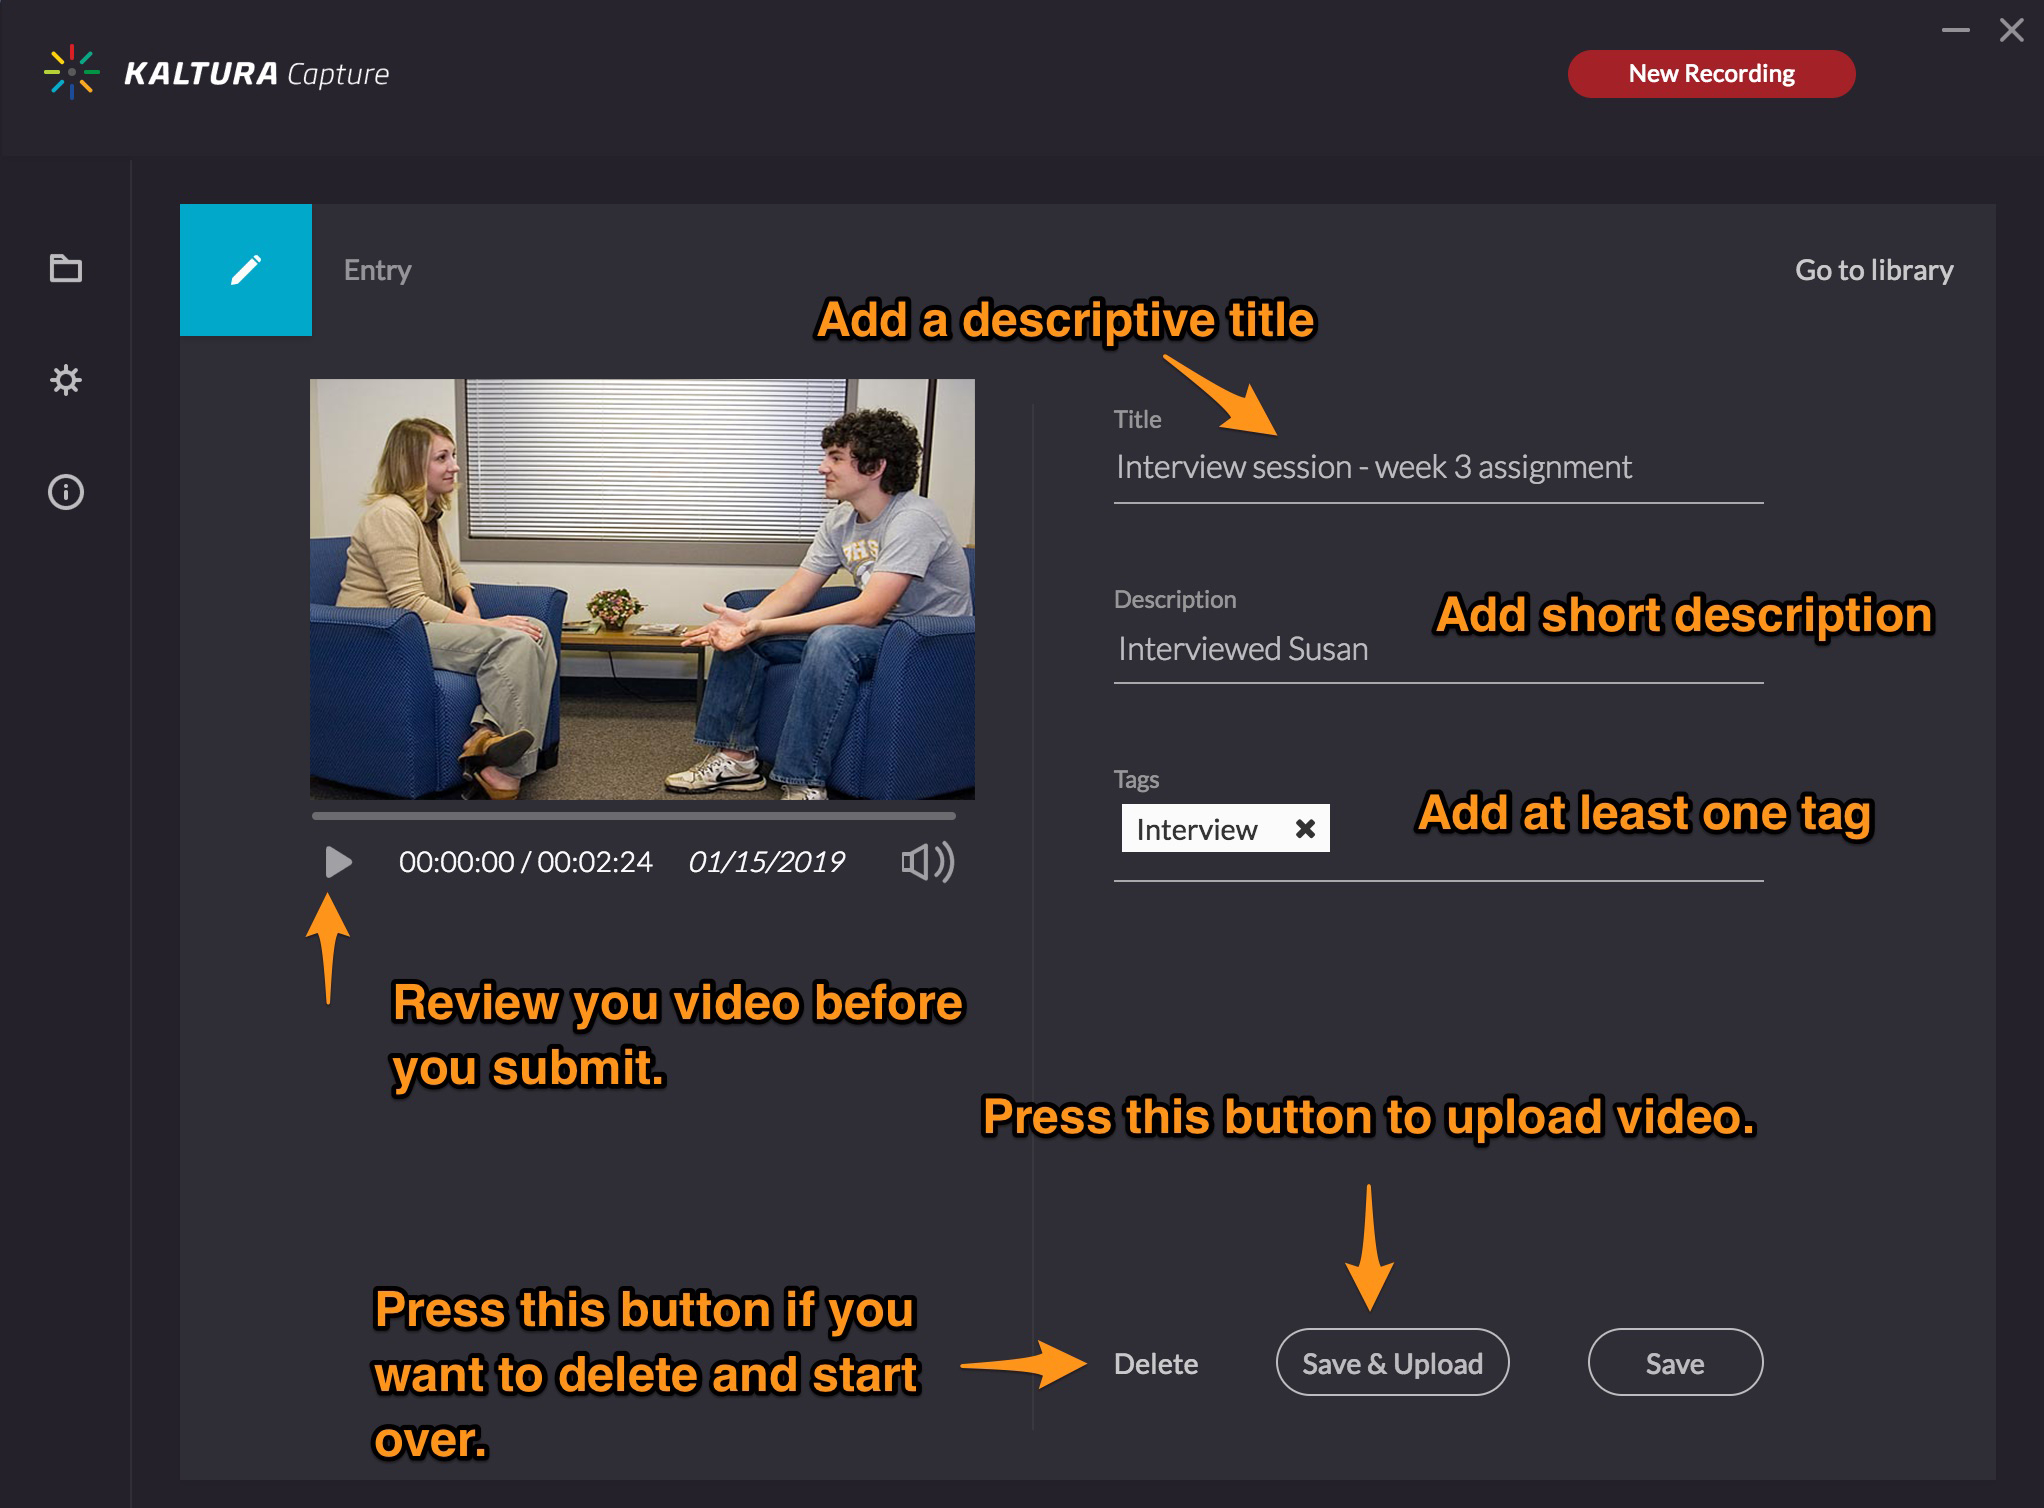
7. After you stop and save your recording, you will see a screen that allows you to Save and Upload or Delete your presentation.
After a few minutes of uploading and processing, your recording will be able in your Canvas My Media section.
Note: Depending on your Internet connection and the duration of your video, this could several minutes. We recommend that you upload your video from campus or some other location with high speed Internet upload speeds.
Submit Video To Canvas
To submit your video, please follow these instructions “Kaltura – Submitting a Video Assignment (Student View)“:
Notes on Devices
- Kaltura Capture is only available for Windows and Mac full operating systems.
- This application will not work in iOS.