When using PowerPoint or Apple Keynote in ZOOM, the default setting is for PowerPoint and Keynote to go to full screen. This is bad if you’re in a ZOOM session because all your ZOOM controls will be hidden. Here are some options on how to avoid this from happening.
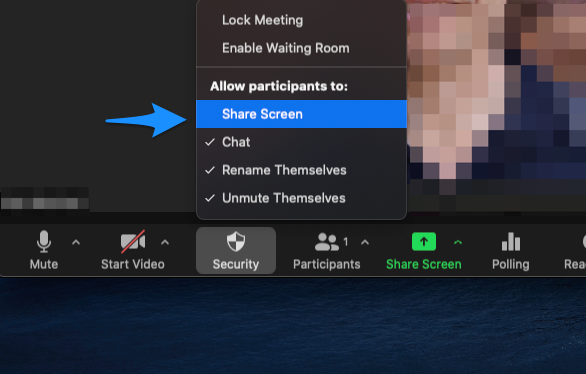
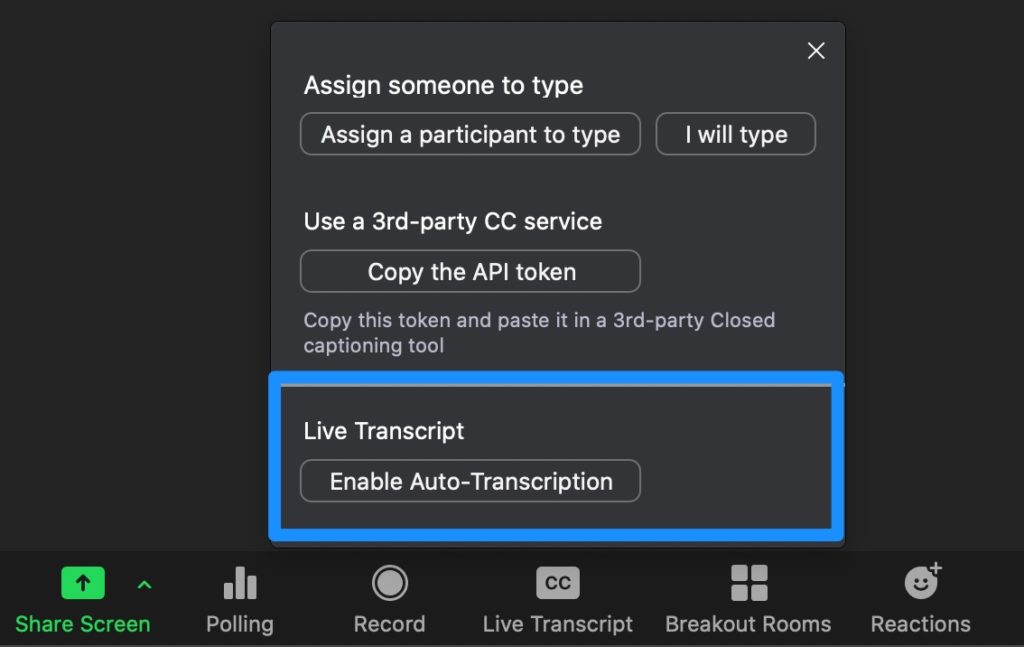
If you are the ZOOM host and you wish to allow people to share their screen, you can modify your Security -> Share Screen or make certain people co-host. Consider turning on ZOOM auto Closed Captions to support participants that may have trouble hearing.
A. Using ZOOM and PowerPoint
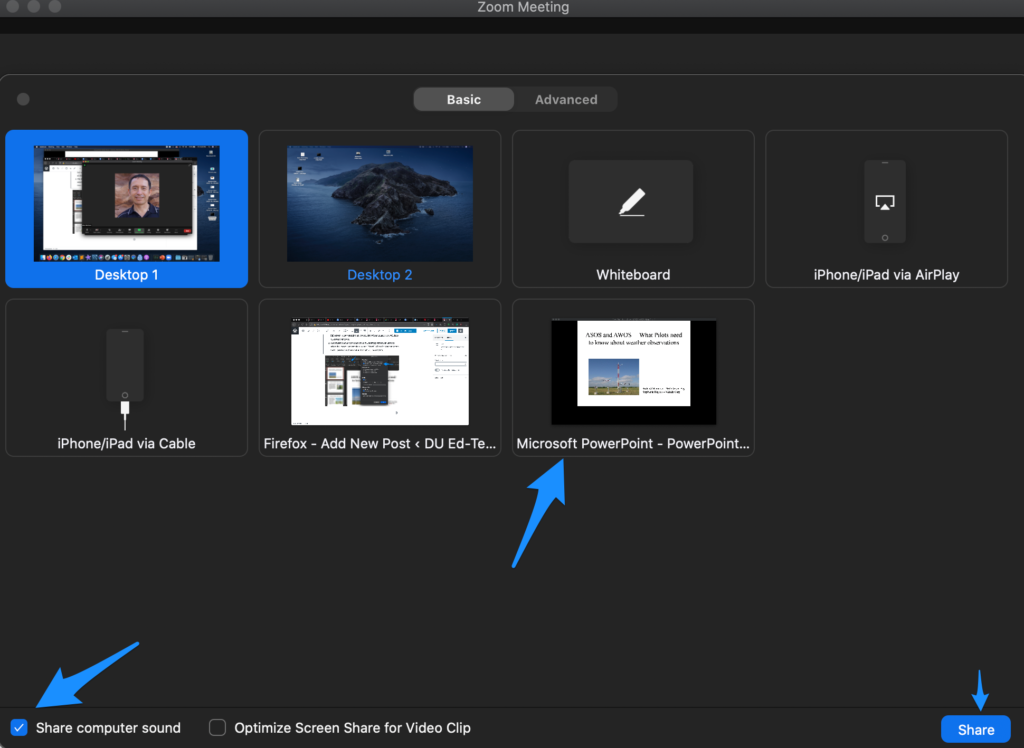
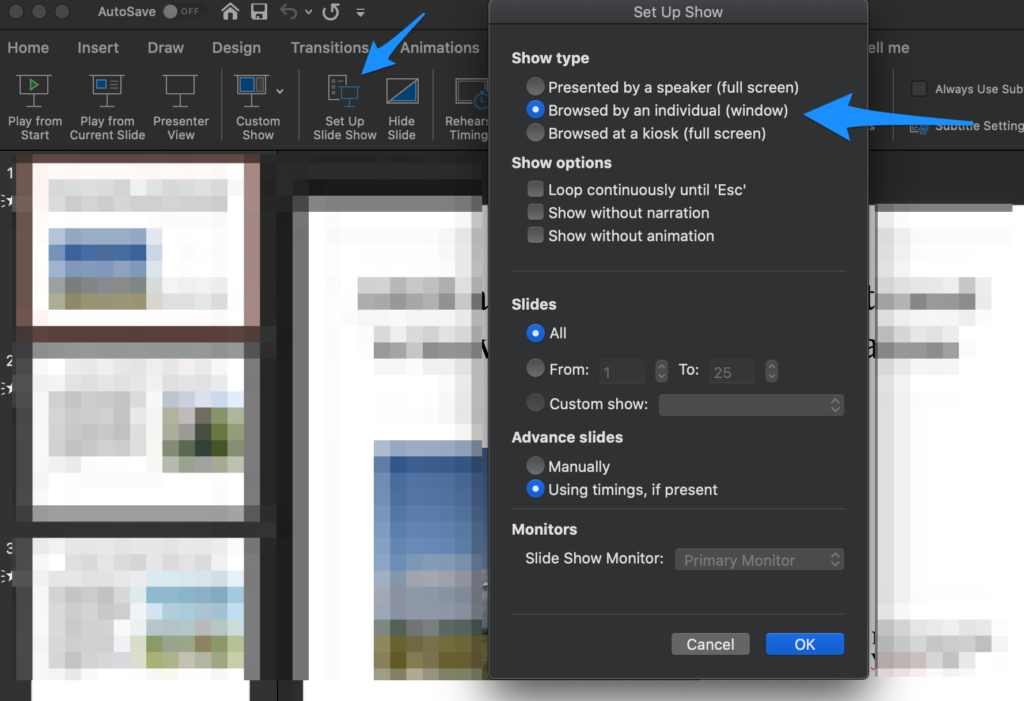
In PowerPoint, go to Slide Show -> Setup Slide Show and select Browsed by Individual Window. Then click Play and now your PowerPoint show will open up in a window, not full screen (see below). As the ZOOM presenter, you will see all your ZOOM features.
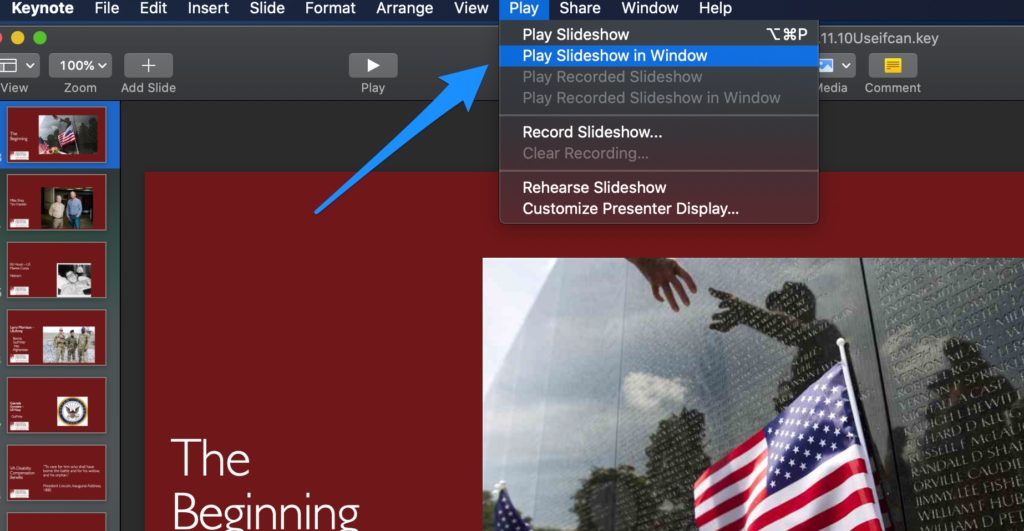
B. Using ZOOM and Apple Keynote
C. Using ZOOM and PDF Presentations
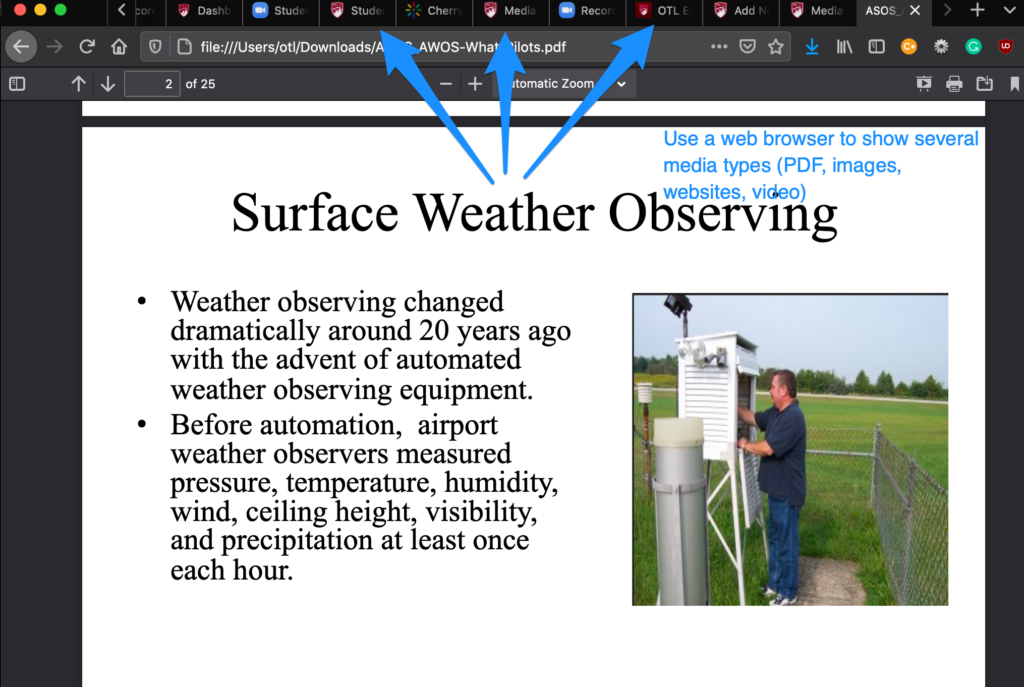
Both PowerPoint and Apple Keynote allow you to save your presentation as a PDF. If your presentation does not have any animation, audio, or video clips, this is a nice way to avoid problems during a ZOOM presentation. If your presentation includes showing several websites, this is a good option because each web browser tab can contain different presentation content.
- In PowerPoint or Keynote, save your slides as PDF
- Using any web browser, click File -> Open to locate your PDF.
- A web browser can display PDF, images, video files. Use separate web browser tabs to hold all your presentation content.
- A PDF allows for zooming in & out to improve visibility.
How to manage several student presentations
- Define the total time that each group has for their presentation.
- Create a group presentation schedule.
- Inform students to make sure their computer microphones and webcams are working before the meeting. Tips for ZOOM Recordings
- As the ZOOM host, you can make each presenter a ZOOM co-host or turn on “Share Screen” for all participants. Disable co-host after the presentation group is done.
- Mute all microphones for all non-participants.
- If the entire session needs to be saved, press Record to record to the cloud or to your local computer.
- Consider recording Gallery View to capture their entire student group.
- Consider using the ZOOM Spotlight feature. Spotlight video puts up to 9 participants as the primary active speakers for all participants, and participants will only see these speakers.
- Consider using the ZOOM Hide Myself feature, this allows non-participants to hide themeselves.
- Consider user Follow Host’s Video Order to force all participants to see the host display.
- Inform students that they can use the ZOOM Annotation tools to draw on the screen they are sharing.
If students need to email their instructor their ZOOM Cloud Recording, check out this article “Using ZOOM to Record a Video Presentation” for details.
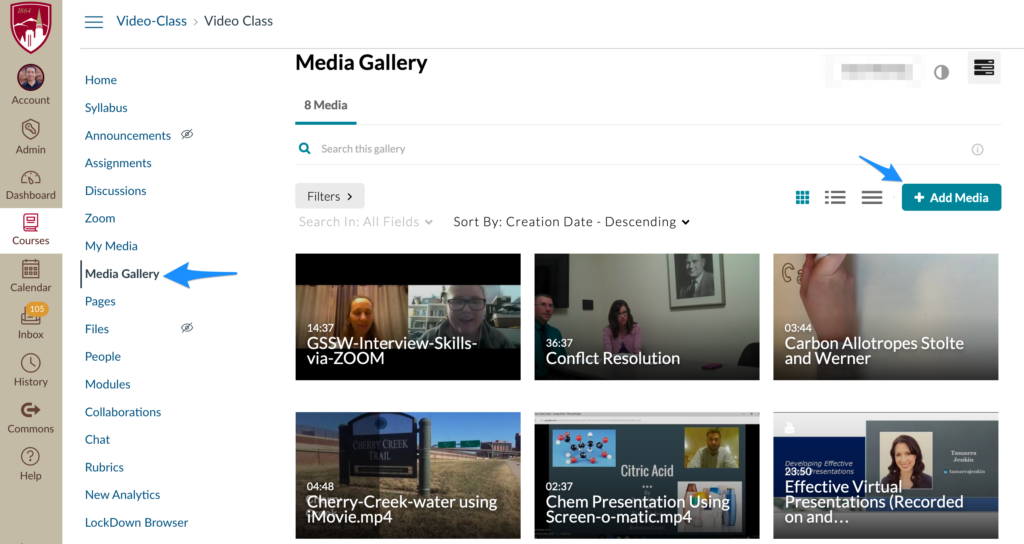
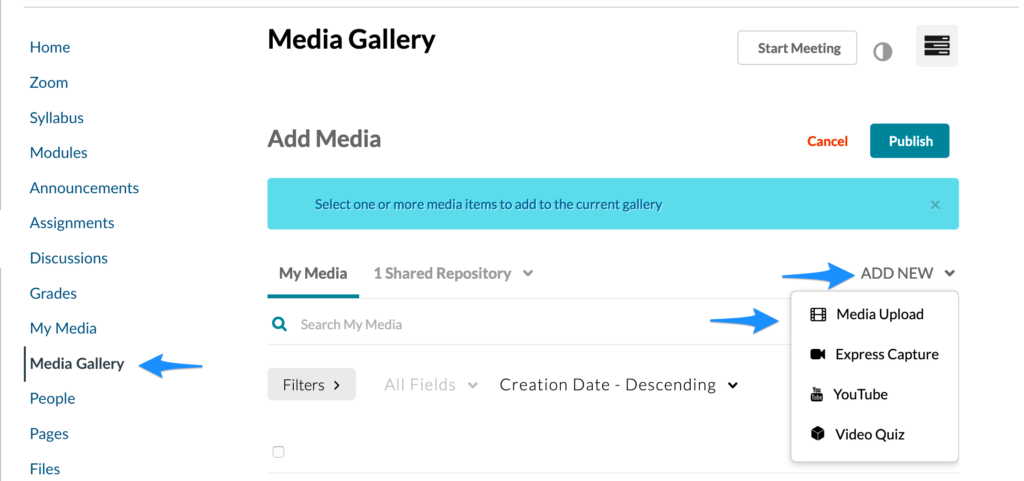
Posting recordings on Canvas Media Gallery
At times, it may be best to have students record their presentations on their own time and then share them via Canvas Media Gallery.
Recording Software:
- ZOOM: The DU ZOOM software allows all DU members to record a local .mp4 video or Cloud recording
- Kaltura Capture: All Canvas class have the My Media where the Kaltura Capture is available for students to use.
- Video Recording Tips
Uploading Student presentations videos to Canvas
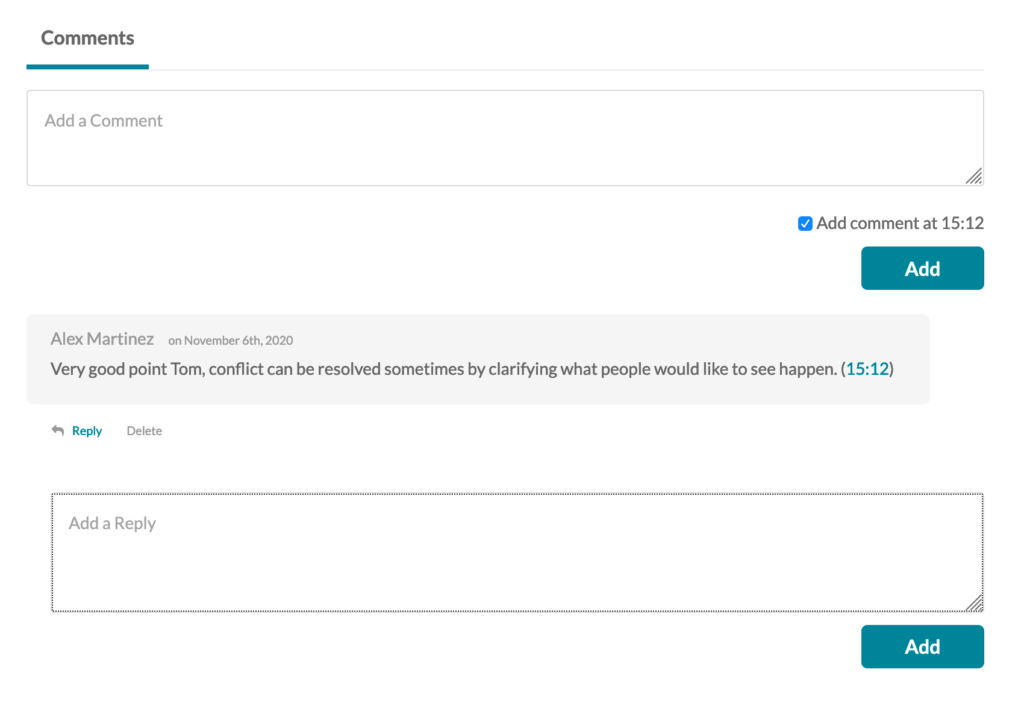
Feedback and annotations
Instructors call allow students to add their feedback and annotation notes to any Media Gallery item. Annotations can be time-code.